Contrary to common belief, ethical wildlife photography isn’t about memorizing distances; it’s about understanding the Canada National Parks Act and reading animal behaviour to prevent disturbance.
- Violating the Act by feeding or disturbing wildlife carries fines up to $25,000, as it leads to dangerous animal habituation.
- Recognizing stress signals like pinned ears on a moose or a bear standing on its hind legs is more critical than relying on a measuring tape.
Recommendation: Prioritize investing in the right telephoto lens (400mm+) and learning patient observation techniques. This allows you to capture intimate shots legally and safely, fulfilling your custodial responsibility to our wildlife.
As a Wildlife Conservation Officer, I’ve seen it all. Photographers with the best intentions causing irreparable harm, and incredible, frame-worthy shots taken from a safe, respectful distance. The urge to get ‘the shot’ is powerful, but in Canada’s national parks, that urge is governed by federal law. Many believe it’s just about following a few simple rules, like “don’t feed the bears” or “keep back 100 metres.” While those are starting points, they are a vast oversimplification of your legal obligations.
The core issue isn’t just about avoiding a fine; it’s about preventing the dangerous habituation of wildlife. When an animal learns to associate humans with food or loses its natural fear, it is often a death sentence for that animal and a severe risk to public safety. The law, specifically the Canada National Parks Act, isn’t designed to be punitive. It’s designed to protect the wild nature of these animals and ensure they can thrive without human interference. It codifies our shared custodial responsibility.
But what if the key to being a better, more successful wildlife photographer wasn’t about pushing the boundaries of the rules, but about understanding the ‘why’ behind them? What if knowing the law and the science of animal behaviour gave you a strategic advantage? This isn’t just a guide to staying out of trouble. This is your official briefing on how to operate as a true professional in the Canadian wilderness: ethically, legally, and more effectively.
This article will break down your responsibilities under the Act, from the gear you carry to the methods you employ. We will cover the specific distances, the severe penalties for violations, how to interpret critical animal stress signals, and how to choose your locations and techniques to maximize your opportunities while minimizing your impact.
Summary: Your Official Briefing on Canadian Wildlife Photography Law
- Telephoto Necessity: Why You Need at Least 400mm for Safe Wildlife Shots?
- The Stress Signals: How to Tell if a Moose Is About to Charge?
- The Baiting Trap: Why Using Food for Photos Is Illegal and Dangerous?
- Blind vs. Stalking: Which Method disturbs Animals Less?
- Golden Hour Activity: Why Are Animals More Active at Dawn and Dusk?
- Wide-Angle Lens vs. Telephoto: Which is Essential for Banff National Park?
- The 100-Meter Rule: What Happens If You Get Too Close to an Elk?
- Banff or Jasper: Which National Park Is Better for Wildlife Viewing?
Telephoto Necessity: Why You Need at Least 400mm for Safe Wildlife Shots?
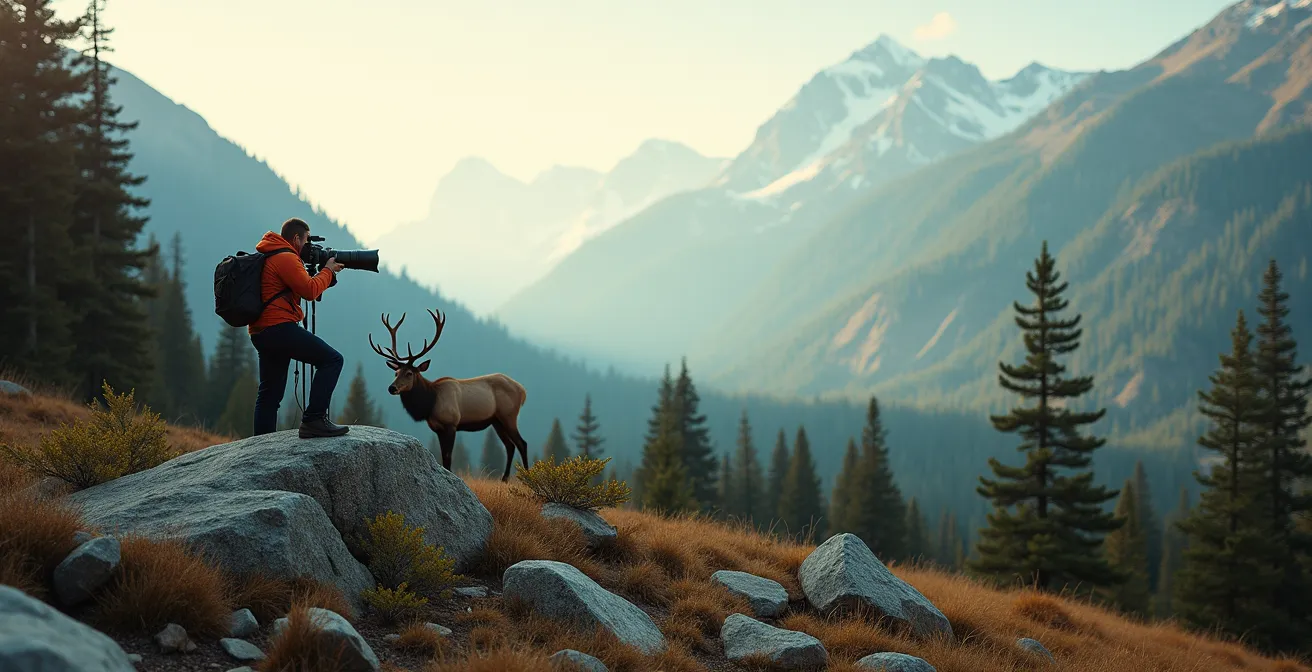
Let’s begin with the most fundamental tool for both legal compliance and photographic success: your lens. The single biggest mistake I see is photographers arriving with standard lenses, realizing they can’t get a decent shot from the legal distance, and then making a poor decision. Your telephoto lens isn’t just for magnification; it’s your primary tool for respecting an animal’s space and adhering to the law. Under the Act, your proximity is your responsibility, and “I didn’t have a long enough lens” is not a valid excuse.
For Canada’s large predators, Parks Canada regulations mandate maintaining a 100-metre minimum distance from bears, wolves, and cougars. That’s the length of a football field. With a standard 50mm or 200mm lens, a grizzly at that distance is a brown speck in your frame. To get a frame-filling, detailed portrait, you realistically need a focal length of at least 400mm, and ideally 500-600mm. For animals like elk and moose, where the minimum distance is 30 metres, a 200-400mm lens is often sufficient.
As you can see, the focal length directly dictates your ability to get a compelling image while remaining legally compliant and safe. Using a telephoto lens isn’t ‘cheating’; it’s the mark of a prepared and respectful photographer. It demonstrates you have planned for the realities of the environment. If you don’t own one, renting specialized gear from gateway towns like Canmore or Jasper is a smart and responsible choice. Arriving unprepared puts both you and the wildlife at unnecessary risk.
The Stress Signals: How to Tell if a Moose Is About to Charge?
The distance rules are a baseline, not a guarantee of safety or ethical conduct. An animal’s comfort zone can change based on the season, the presence of young, or its individual temperament. Your most important skill in the field is not measuring distance, but reading the animal’s behaviour. Recognizing stress indicators is a non-negotiable part of your duty. These signals are the animal’s way of telling you, “You are too close.” Ignoring them is not only dangerous, it constitutes harassment under the Act.
Many visitors are surprised to learn that, statistically, moose cause more injuries to people in Canadian parks than bears each year. A moose can feel threatened at 50 metres, well beyond the 30-metre legal minimum. A defensive moose will pin its ears back, the hair on its neck (hackles) will stand up, and it may begin licking its lips nervously. If you see these signs, you have already overstayed your welcome. Immediate danger signs include stomping its feet and lowering its head with a direct stare. This is your final warning before a charge.

Learning these signals for different species is crucial. It allows you to be proactive, backing away *before* an animal feels the need to escalate its response. This is the difference between a peaceful encounter and a dangerous conflict. The following table is a crucial resource that you should study before heading into the field.
| Animal | Visual Warning Signs | Auditory Cues | Immediate Danger Signs |
|---|---|---|---|
| Moose | Ears pinned back, raised neck hair, licking lips | Grunting, teeth grinding | Stomping, lowered head, direct stare |
| Elk | Flattened ears, whites of eyes showing | Bugling (bulls), barking (cows) | Head swaying, pawing ground |
| Grizzly Bear | Standing on hind legs, jaw popping | Woofing, huffing sounds | Bluff charging, teeth clacking |
| Black Bear | Ears back, head low | Blowing, tongue clicking | False charges, slapping ground |
The Baiting Trap: Why Using Food for Photos Is Illegal and Dangerous?
Let me be unambiguously clear: feeding or baiting wildlife in a Canadian National Park for any reason, including photography, is illegal. It is one of the most serious offences a visitor can commit. This isn’t a minor infraction; it is an act that fundamentally alters an animal’s behaviour, destroys its wildness, and directly endangers other people. The legal consequences reflect this severity. Under the Canada National Parks Act, violators face prosecution with fines up to $25,000.
The practice, often called baiting, creates what we call “food-conditioned” animals. An animal that receives food from a human learns that humans are a reliable and easy source of calories. This process of habituation is irreversible. A food-conditioned bear will begin approaching campsites, cars, and people, and its behaviour will inevitably become more aggressive as it seeks its next ‘fix’. In almost every case, a food-conditioned predator must be destroyed by park staff to ensure public safety. By leaving out food, you are signing that animal’s death warrant.
Case Study: The Consequences of Baiting
Ontario Parks has documented numerous cases of photographers engaging in illegal baiting. These include incidents where individuals smeared trees with wet cat food and peanut butter to attract reclusive pine martens, and even lured red foxes directly into their vehicles with chicken meat. These practices directly “train” the animals to abandon their natural caution around humans, leading to a sharp increase in dangerous human-wildlife conflicts and requiring management intervention.
This prohibition extends to all forms of luring, including the use of animal calls and drones. Flying a drone is illegal in all National Parks and is considered a form of harassment that can cause extreme stress and lead to displacement. As photographer Susan Villemaire notes, “I think the smallest thing that you could do to help the wildlife is protecting their safe space.” Baiting is the ultimate violation of that safe space.
Blind vs. Stalking: Which Method disturbs Animals Less?
There are two general approaches to wildlife photography: active stalking or passive observation. Stalking involves actively tracking and following an animal. While it can sometimes yield results, it has a high potential for disturbance. Every step you take, every rustle of your jacket, alerts the animal to your presence. This forces it to expend precious energy monitoring you instead of feeding, resting, or caring for its young—a phenomenon known as displacement. From a legal and ethical standpoint, the less you force an animal to react to you, the better.
The far superior method, which disturbs animals less and often yields more natural and intimate photographs, is patient observation, often from a fixed position or a “blind.” This doesn’t necessarily mean a physical tent. It’s a mindset. It involves scouting a location for signs of activity—tracks, scat, feeding areas—and positioning yourself downwind, using natural concealment like trees or rocks, well before the animal is expected to arrive. You become part of the landscape.
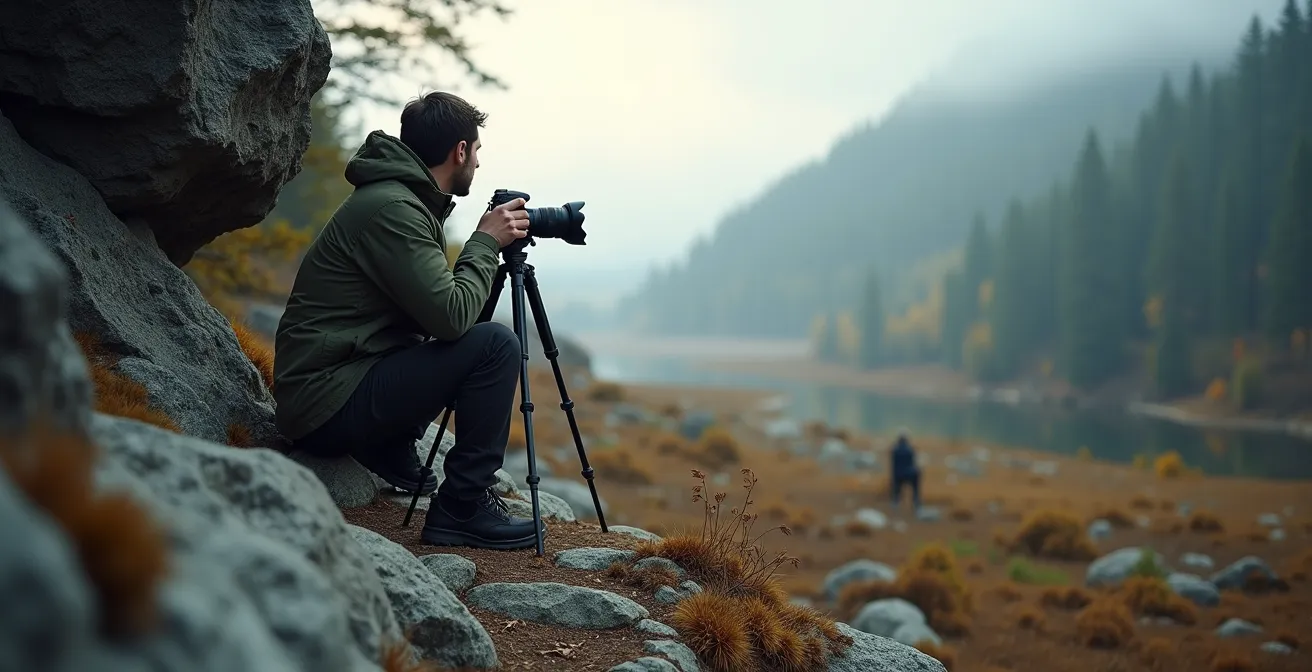
The key to this method is patience. After you set up, you must remain still and quiet. It might take an hour or more, but eventually, wildlife will emerge and resume their natural behaviours, often forgetting you are even there. They become habituated to your stationary presence, not to you as a mobile threat or food source. This is the ethical way to get close. The animal is in control of the encounter, and the resulting photographs show the animal behaving naturally, not reacting to a human threat. This method respects the animal’s autonomy and results in more powerful imagery.
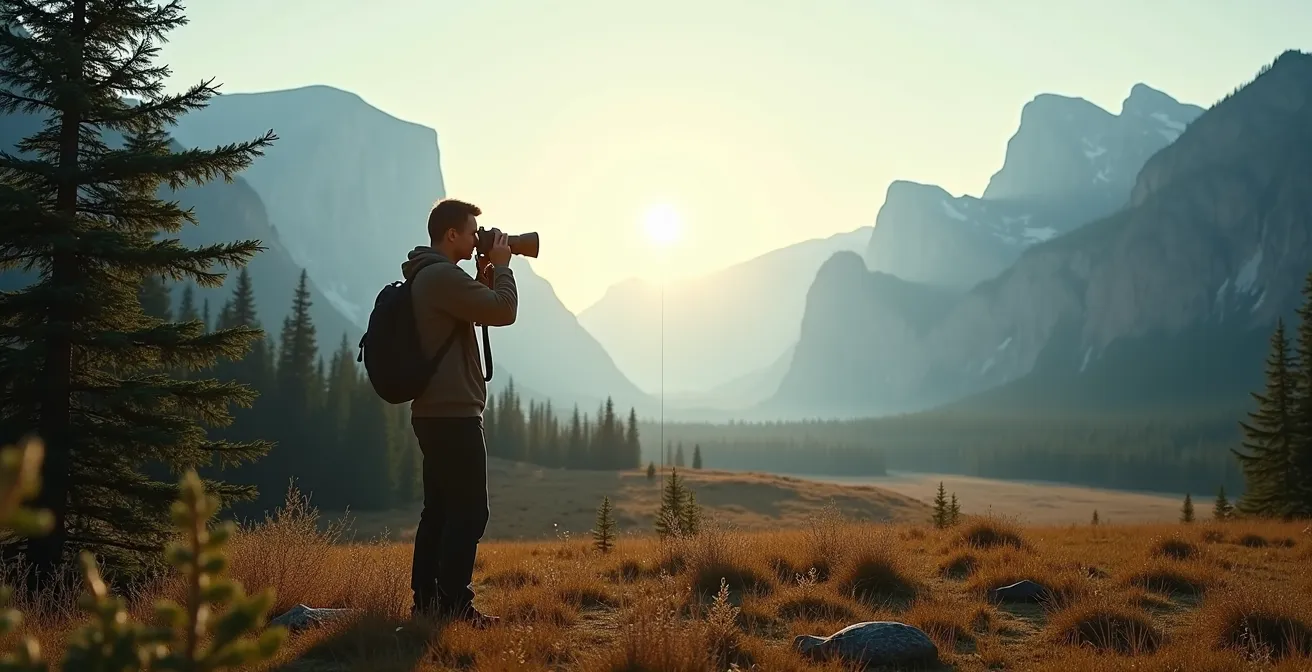
Golden Hour Activity: Why Are Animals More Active at Dawn and Dusk?
Understanding the ‘when’ is just as important as the ‘how’ and ‘where’. Most of Canada’s large mammals are crepuscular, meaning they are most active during the low-light hours of dawn and dusk. There are several reasons for this. Cooler temperatures allow them to move and forage without overheating, the softer light provides camouflage from predators (and prey), and there is generally less human activity during these times. For a photographer, this is a double-edged sword. The “golden hour” light is magnificent, but operating in low visibility comes with its own set of responsibilities.
Planning your shoots around these peak activity times dramatically increases your chances of a successful outing. In the summer, this may mean being in position by 5:00 AM or staying out until 9:00 PM. In the fall and winter, these windows shift with the shorter days. Bears, for instance, will be most active in the early morning and evening during spring and summer before they enter hibernation. Owls are also highly active in the pre-dawn and post-dusk hours. Knowing these rhythms allows you to be in the right place at the right time, minimizing the time you spend searching and maximizing your chances for an encounter.
However, this is also when the risk of a surprise encounter is highest. Poor light reduces your ability to see an animal and its ability to see you. It is your absolute duty to take extra precautions. This is not optional; it’s a critical component of safety and responsibility in the field. You must be prepared to make noise to avoid startling an animal and have your safety gear, especially bear spray, instantly accessible.
Your Action Plan: Dawn/Dusk Safety Protocol in Canadian Wilderness
- Carry bear spray in an easily accessible position, such as a chest or hip holster, never inside your backpack.
- Wear a headlamp, preferably one with a red light option to preserve your night vision while you wait.
- Make noise regularly by talking, clapping, or using a bell to announce your presence and avoid surprising wildlife in low visibility.
- Travel in groups of four or more whenever possible, as larger groups are a significant deterrent for predators.
- Avoid taking shortcuts through thick brush or berry patches where visibility is near zero and you could startle a feeding bear.
Wide-Angle Lens vs. Telephoto: Which is Essential for Banff National Park?
The question of which lens is “essential” for a location as vast and varied as Banff is a false choice. The correct answer, from a professional and ethical standpoint, is both. Attempting to photograph Banff’s grand landscapes and its iconic wildlife with a single lens will lead to frustration and missed opportunities. A prepared photographer in Banff operates with a two-body system to adapt to any situation instantly, ensuring they can capture the scene ethically and effectively.
Your first body should be equipped with a wide-angle zoom (e.g., 16-35mm). This is your landscape lens, essential for capturing the scale of places like Moraine Lake or the Athabasca Glacier. It’s also your tool for “environmental portraits,” where an animal is a small but vital element in a grand scene. This approach allows you to tell a story about the animal within its habitat, without needing to get physically close. This is often the most powerful form of wildlife photography.
Your second body, immediately accessible via a harness or capture clip, must have your telephoto lens (e.g., 100-400mm or longer). This is your dedicated wildlife lens. Encounters in the Rockies are often fleeting. A bear might appear on the roadside for only a minute, or a wolf pack may be visible across the valley. You will not have time to stop, open your bag, and change lenses. The shot will be gone. Having the telephoto ready allows you to immediately frame the animal from a safe, legal distance. This system is crucial along wildlife corridors like the Bow Valley Parkway, where Banff National Park is home to 45 wolves in 5 packs, with sightings being frequent but brief.
The 100-Meter Rule: What Happens If You Get Too Close to an Elk?
The “100-meter rule” is one of the most cited—and misunderstood—regulations. It’s crucial to be precise: the 100-metre (10 bus lengths) minimum distance applies specifically to predators: bears, wolves, and cougars. For herbivores like elk, deer, and moose, the official rule is different. As an officer, I must be clear: Parks Canada regulations specify a minimum distance of 30 metres (3 bus lengths) for these animals. Getting this wrong is not just a technical error; it puts you in a position of significant danger, especially with elk.
While 30 metres may seem close, an elk can cover that ground in seconds. They are not gentle giants, particularly during two key periods. During the spring calving season (May-June), protective cows will aggressively defend their hidden calves from any perceived threat, including a photographer who wanders too close. Even more dangerous is the fall rutting season (August-September), when bull elk, flush with testosterone, are notoriously belligerent and unpredictable. They will challenge anything they see as a rival, including people and vehicles.
Every year, park staff deal with the consequences of people ignoring this 30-metre rule. During the rut, human proximity often results in charges, serious injuries, and significant vehicle damage. In the worst-case scenarios, an elk that has become overly aggressive towards people must be destroyed for public safety. Your decision to inch closer for a photo can directly lead to that outcome. This is the harsh reality of “getting the shot” at all costs. The 30-metre rule isn’t arbitrary; it’s a buffer zone established to prevent these tragic and entirely avoidable conflicts.
Key Takeaways
- Your legal responsibility under the Canada National Parks Act is to prevent disturbance, not just measure distance. Fines for harassment can reach $25,000.
- Learn to read animal stress signals (e.g., pinned ears, raised hackles). They are a more reliable indicator of disturbance than a fixed distance.
- Invest in and master a telephoto lens (400mm+) to capture detailed images from a legal and safe distance. This is non-negotiable.
Banff or Jasper: Which National Park Is Better for Wildlife Viewing?
The better park for wildlife viewing depends entirely on your goals as a photographer, your tolerance for crowds, and your commitment to ethical principles. Banff offers higher density and more accessible roadside viewing, making it a great starting point for beginners. You are almost guaranteed to see elk and bighorn sheep. However, this accessibility comes with heavy tourist traffic, which can lead to stressful “wildlife jams” and compromised situations.
Jasper, by contrast, offers a more rugged, wilderness-like experience. While you might work harder for your shots, the encounters are often more intimate and the animal behaviour less disturbed by constant traffic. Jasper is known for a greater diversity of species, including a higher chance of seeing moose and bears, especially along the Maligne Lake Road. One experienced photographer noted, “I love Jasper National Park and it has been more fruitful for wildlife… Maligne Lake Road was the highlight, on one evening we saw a Grizzly, Bighorn sheep, 3x mother moose with calf.”
However, this comes with a greater ethical weight. The conservation stakes are higher in Jasper. For example, conservation data reveals that only 70 Woodland Caribou remain in Jasper National Park, part of a critically endangered population. An encounter with these animals requires the utmost caution and distance, as any disturbance can have dire consequences for the herd’s survival. Your choice of park is also a choice about the level of responsibility you are willing to assume.
| Feature | Banff National Park | Jasper National Park |
|---|---|---|
| Wildlife Density | Higher roadside visibility | More diverse, less disturbed |
| Iconic Species | Elk, Bighorn Sheep (accessible) | Bears, Moose, Woodland Caribou (rare) |
| Best Locations | Bow Valley Parkway, Vermillion Lakes | Maligne Lake Road, less crowded overall |
| Photographer Type | Beginners, accessible shots | Advanced, patient photographers |
| Crowds | Very touristy, congested | Less crowded, more wilderness feel |
| Conservation Stakes | Roadside elk less sensitive | Endangered caribou require extreme caution |
Ultimately, your success as a wildlife photographer in Canada’s parks is not measured by the proximity of your shots, but by the respect and foresight you demonstrate. By understanding the law, reading the animals, and using the right equipment, you transition from being a tourist with a camera to a custodian of our national heritage. This approach will not only keep you and the wildlife safe; it will result in more powerful, authentic, and meaningful photographs. Now, it is your responsibility to put these principles into practice on your next visit.