In summary:
- Success in whitewater isn’t about one stroke; it’s about developing “river sense” and having a dynamic conversation with the current.
- Mastering core safety skills like the wet exit and understanding cold water risks are non-negotiable prerequisites for tackling rapids.
- Effective river reading—identifying eddies, understanding flow levels, and strategic positioning—is more critical than raw power.
- Canadian waterways, from the Ottawa River to the Yukon, demand specific gear and respect for the environment, including its wildlife structures.
You’ve mastered the placid waters of a calm lake. Your canoe glides effortlessly, your J-stroke a quiet, efficient motion that keeps you true. But then you look towards the horizon, where the river narrows, whitens, and roars. The thought of transitioning from flatwater to the dynamic chaos of Class III rapids is both thrilling and intimidating. The common advice you hear is to simply “practice your J-stroke,” but you instinctively know it’s more complex than that. While the J-stroke is a foundational steering tool, treating it as a magic bullet for whitewater is a dangerous oversimplification.
The real key to safely navigating moving water isn’t about commanding the canoe with rigid, memorized techniques. It’s about developing a fluid, responsive relationship with the river itself. This is the professional’s mindset: seeing paddling not as a monologue of your intentions, but as a dynamic “river conversation.” Each paddle stroke is a word, a response to the questions the current is asking. The push of a wave, the pull of an eddy, the surge of the main channel—these are all prompts. Your job is to listen, interpret, and answer with the correct stroke at the correct time. A J-stroke isn’t just for going straight; it’s for subtly adjusting your angle to enter an eddy or peel out into the current. A pry is a sharp exclamation to avoid a rock. A draw is a gentle invitation to move closer to shore.
This guide is built on that philosophy. We will move beyond the mechanics of a single stroke to build the interconnected skills and “river sense” you need. We’ll cover fundamental safety, the nuances of river reading, and the specific gear considerations for Canada’s uniquely challenging and beautiful waterways. This is your path from being a passenger in the current to becoming an active participant in the conversation.
For those who prefer a visual summary, the following video provides an excellent breakdown of the J-stroke’s mechanics, which serve as a foundational “word” in your river vocabulary.
To navigate this complex subject, we have structured this guide to build your skills progressively. You will learn everything from the fundamental differences in boat control to the critical safety protocols and gear required for serious Canadian river expeditions. This framework will provide you with a comprehensive understanding for your transition to whitewater.
Summary: An Instructor’s Guide to Whitewater Safety and Skill
- Canoe vs. Kayak: Which Is Harder to Roll in Whitewater?
- The Wet Exit: How to Escape a Capsized Canoe Without Entanglement?
- Hypothermia in Summer: Why Do You Need a Wetsuit on the Ottawa River?
- Identifying Eddies: How to Spot Safe Zones in Turbulent Water?
- Spring Run-Off vs. Summer Flow: When Is the River Too High for Beginners?
- The Beaver Dam Hop: How to Cross Without Breaking the Structure?
- Lake Louise vs. Moraine Lake: Which Is More Stunning for a Canoe Rental?
- Exploring Yukon’s Wilderness: The Safety Gear You Must Pack
Canoe vs. Kayak: Which Is Harder to Roll in Whitewater?
The direct answer is that a traditional open canoe is significantly harder to roll than a kayak. This comes down to boat design and paddler position. A kayaker is seated low, secured with a spray skirt, and uses their hips in close connection with the boat—a system designed for rolling. In a classic canoe, the higher center of gravity and open design make a roll nearly impossible. However, the question becomes more nuanced when we talk about modern, fully-outfitted whitewater canoes, which blur the lines and are central to our “river conversation” philosophy.
These specialized canoes feature saddles, thigh straps, and airbags, which essentially transform the boat into a C-1 (Canoe, for one person). This outfitting allows the paddler to have the same hip connectivity as a kayaker, making a roll achievable, though still technically demanding. The open-face nature of the canoe paddle (versus a double-bladed kayak paddle) requires a more complex, multi-phase setup for the roll.
Case Study: Bill Mason’s Legacy and Modern Canadian Canoe Design Evolution
Canadian canoeing legend Bill Mason paddled a traditional open canoe, relying on powerful bracing strokes to prevent capsizing. Today, the evolution of the sport is demonstrated by athletes like David Hearn, a World Whitewater C1 Champion from Canada. Hearn showcases how modern outfitting has made canoes more responsive and even rollable. His technique proves that while the canoe remains inherently more challenging to roll than a kayak, dedicated paddlers can achieve it by mastering the connection between their body and the fully-outfitted boat. This evolution shifts the focus from simply preventing a capsize to having a complete toolkit of responses, including recovery.
For the intermediate paddler, the takeaway isn’t that you must learn to roll immediately. Instead, understand that a canoe demands a higher level of active bracing and strategic positioning to prevent a capsize in the first place. Your J-stroke, draws, and pries are your primary tools for keeping the boat stable and upright in turbulent water. This focus on prevention is a cornerstone of safe canoe progression.
The Wet Exit: How to Escape a Capsized Canoe Without Entanglement?
If prevention fails, your single most important safety skill is the wet exit. A clean escape from a capsized, outfitted canoe is not automatic; it is a practiced, deliberate skill. Entanglement in straps or being trapped under the boat in cold, moving water is a life-threatening situation. The stakes are incredibly high, as a 2006 Canadian Red Cross Drowning Report noted that 2,007 persons died of cold-water immersion in Canada over a ten-year period. A panicked response is the greatest danger, leading to entanglement and exhaustion.
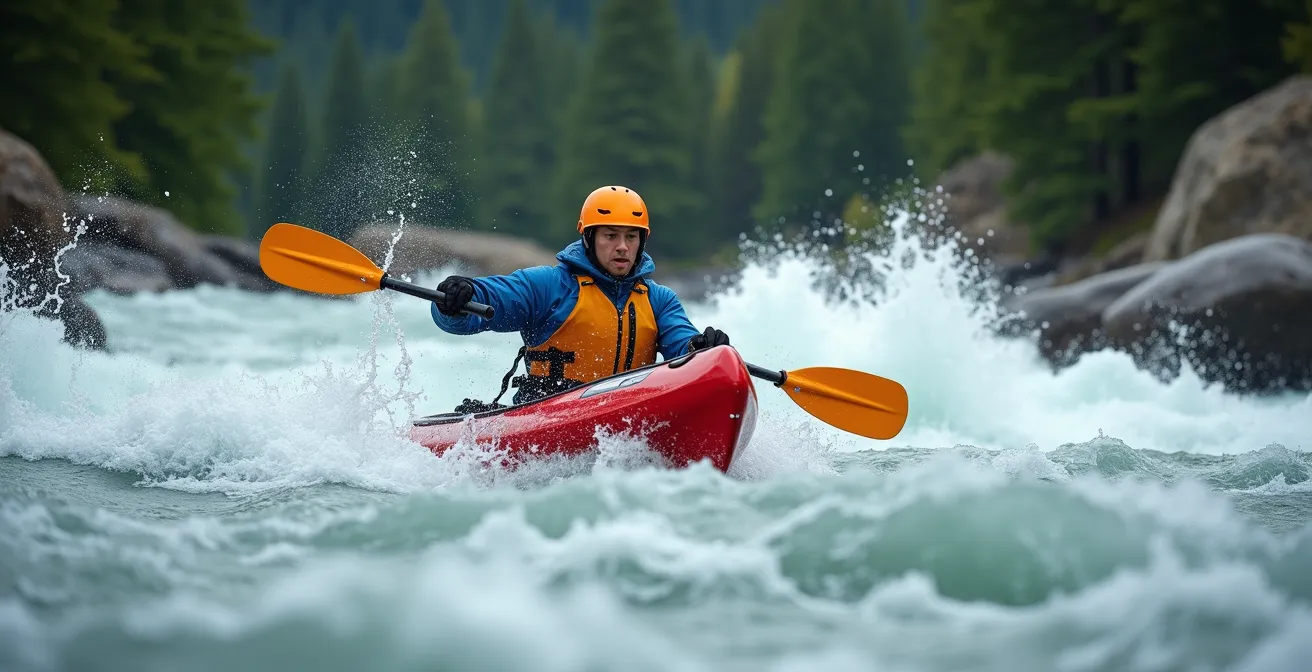
The key to a safe wet exit is muscle memory built through practice in a controlled environment. The goal is to get out of the boat smoothly and quickly, without fighting your gear. The following image illustrates the critical “tuck and push” moment, which is the core of the maneuver.

As you can see, the paddler’s body is positioned to roll out, not pull up. This technique uses leverage and body mechanics, not brute strength. Below is the precise protocol you should practice until it becomes second nature.
Gear-Specific Exit Protocol for a Fully-Outfitted Whitewater Canoe
- Release Spray Deck: If you use one, pull the front grab loop forward and away to pop the seal. Maintain your grip on your paddle if possible.
- Execute ‘Tuck and Push’: This is the crucial step. Tuck your chin to your chest to protect your head and create an air pocket. Simultaneously, place both hands on your thigh straps and push down and away firmly.
- Roll Sideways: As you push, roll your body sideways out of the saddle. Keep your legs relaxed; do not kick or struggle, as this is how feet get caught. Let the boat slide off you.
- Clear the Boat: Once free, use your feet to push yourself away from the canoe, ensuring you are clear of any dangling ropes or gear.
- Surface and Assess: Get to the surface immediately. Your first priority is to locate your boat and position yourself upstream of it to avoid being pinned. Then, look for downstream hazards like sweepers or logjams, which are common in Canadian rivers.
Hypothermia in Summer: Why Do You Need a Wetsuit on the Ottawa River?
One of the biggest mistakes intermediate paddlers make is underestimating the danger of cold water, especially in Canada during the summer. You might be paddling on a 30°C day on the Ottawa River, but the water temperature can still be a shocking 15°C or less. This temperature difference creates a significant risk of cold shock and hypothermia. Cold shock is the body’s involuntary gasp reflex upon sudden immersion in cold water, which can lead to aspiration of water and drowning, long before hypothermia sets in. For context, Canadian Safe Boating Council data shows that a staggering 60% of Canadian boaters who drowned did so in water colder than 10°C, and another 34% in water between 10°C and 20°C. Dressing for the water temperature, not the air temperature, is a non-negotiable rule in Canadian whitewater.
This is where thermal protection becomes critical. For most Canadian summer whitewater conditions, a wetsuit is the standard piece of equipment. It works by trapping a thin layer of water against your skin, which your body then heats up, providing insulation. For colder water or multi-day trips, a drysuit is the superior, albeit more expensive, option. It keeps you completely dry by using gaskets at the neck and wrists. The following table breaks down the decision-making process, contextualized for paddling in Canada.
| Factor | Wetsuit | Drysuit |
|---|---|---|
| Water Temperature Range | 10-20°C (50-68°F) | Below 10°C (50°F) |
| Cost | $150-400 CAD | $800-2000 CAD |
| Durability on Canadian Shield | High – neoprene resists abrasion | Medium – requires careful use on granite |
| Multi-day comfort | Can remain damp between sessions | Stays dry, more comfortable |
| Cold shock protection | Good – reduces initial shock | Excellent – prevents water contact |
For a paddler on the Ottawa River in July, a 3mm or 4mm wetsuit is typically the right choice. It provides excellent protection against cold shock and hypothermia during swims, offers good mobility, and is durable enough to handle the occasional scrape on the granite rocks of the Canadian Shield. Forgoing this piece of gear is not saving money; it’s taking an unacceptable risk.
Identifying Eddies: How to Spot Safe Zones in Turbulent Water?
If strokes are the words of your “river conversation,” then eddies are the punctuation. An eddy is an area of calmer, often upstream-flowing water created by an obstruction like a boulder, a point of land, or a bridge abutment. For a whitewater canoeist, eddies are not just rest stops; they are your primary tool for strategic positioning. They are where you pause the conversation to scout the next rapid, set up safety for other paddlers, or simply catch your breath. Being able to confidently “eddy hop”—moving from one safe zone to the next down a rapid—is the essence of navigating Class III water in control.
Spotting eddies is the first step in developing your “river sense.” You’re looking for the “eddy line,” the distinct, often turbulent boundary between the downstream main current and the slower, recirculating water in the eddy. A clean, defined line usually indicates a good, stable eddy. A surging, boiling eddy line signals an unstable zone that could be difficult to enter and exit. The character of eddies can also vary based on Canadian geography; the sharp, deep eddies formed by the granite of the Canadian Shield require a more aggressive entry angle than the softer, more forgiving eddies found behind gravel bars in the Rocky Mountains.
Case Study: The Eddy-Hopping Strategy
Master canoeist Ray Goodwin refers to this skill as part of the “river conversation.” He demonstrates how to use eddies as strategic checkpoints, powering into them with precise edge control and adjusting the canoe’s angle to set up for the next move. This isn’t just about finding calm water; it’s about using the eddy’s energy to your advantage, tightening turns, and maintaining momentum. This proactive approach is fundamental for controlling your descent through complex rapids.
Your Checklist for Reading Eddies
- Look for the Obstruction: Eddies always form behind something. Identify the rock or point of land creating the hydraulic “shadow.”
- Identify the Eddy Line: Trace the boundary between the fast downstream current and the slower water. Is it sharp and defined (good) or boiling and surging (potentially dangerous)?
- Observe the Rotation: Look for the gentle upstream rotation of water within the eddy. This confirms it’s a classic eddy and not a more dangerous hydraulic feature.
- Assess the Size: Is the eddy large enough for your canoe? You need enough space to turn around and prepare for your exit.
- Plan Your Entry and Exit: Before you commit, plan your angle of approach to cross the eddy line and your peel-out strategy to re-enter the main current.
Spring Run-Off vs. Summer Flow: When Is the River Too High for Beginners?
The same stretch of river can feel like two completely different worlds depending on the water level. A friendly Class II ripple in August can transform into a raging, continuous Class III+ torrent during spring melt. Understanding how to read and interpret river levels is a critical component of dynamic safety and “river sense.” Paddling a river that is above your skill level is one of the most common ways intermediates get into serious trouble. Higher water doesn’t just mean faster current; it means fewer and smaller eddies, more powerful hydraulic features, and less time to react.
In Canada, paddlers have an invaluable tool at their disposal: the real-time hydrometric data from the Water Survey of Canada. Learning to use this resource is a hallmark of a responsible whitewater paddler. Before any trip, you should be checking the flow rate, measured in cubic meters per second (m³/s). For your local runs, you’ll begin to associate these numbers with on-the-water conditions. For example, a familiar run might be “low” at 20 m³/s, “fun” at 40 m³/s, and “pushy and dangerous” at 80 m³/s.
Case Study: Reading Water Survey Canada Data on the Jacques-Cartier River
Paddlers in Quebec use real-time data to interpret conditions on the Jacques-Cartier River. They know that a flow under 20 m³/s is considered low, ideal for learning. The range of 20-40 m³/s is considered the perfect “ideal” flow. Once the river pushes past 40 m³/s, it’s considered “high,” and above 80 m³/s, it enters “flood stage.” At these higher levels, the river’s character changes completely. Eddies disappear, familiar rapids merge into one long, continuous wave train, and the consequences of a swim become much more severe. This data allows a paddler to make an informed go/no-go decision before even leaving the house.
A general rule for those transitioning to Class III is to avoid rivers during peak spring run-off. This period, typically from April to early June depending on the region, is when the snowpack is melting and river levels are at their highest and most unpredictable. Wait for the more stable and predictable flows of summer. If you do paddle in the spring, remember that the water is at its absolute coldest, and the risk of intense cold shock is at its peak in water temperatures between 10-15°C.
The Beaver Dam Hop: How to Cross Without Breaking the Structure?
As you explore more of Canada’s wilder rivers, particularly in the Boreal forest and Canadian Shield, you will inevitably encounter beaver dams. While they may seem like simple obstacles, they are a critical part of the ecosystem. A responsible paddler, engaged in a respectful “river conversation,” knows how to cross these structures with minimal impact. Crashing through or breaking a dam apart is not only poor etiquette but also harms a keystone species and can drastically alter the local hydrology. There are established, low-impact techniques for getting your boat over a dam.
The goal of any technique is to distribute your weight and the boat’s weight as widely as possible and to avoid putting point pressure on the delicate stick-and-mud matrix. The two primary methods are the “Gunwale Walk” for solo paddlers and the “Side-Slip” for tandem teams.
Two Low-Impact Beaver Dam Crossing Techniques
- Gunwale Walk (Solo): Approach the dam slowly and perpendicularly. Place your paddle across the gunwales in front of you to act as a stabilizer. Shift your weight to the center of the boat, stand up carefully, and, using the paddle for balance, “walk” the canoe across the dam with small steps, keeping your weight over the center line.
- Side-Slip Method (Tandem): This is the most stable method for two people. Both paddlers should exit the canoe into the shallow water on the same side. Position the canoe parallel to the dam. Together, lift and slide the boat sideways over the top of the structure, maintaining minimal contact. Once across, re-enter the canoe.
This careful approach is more than just a technique; it’s an ethical obligation for anyone paddling in Canadian wilderness. It reflects a deeper understanding of our role as visitors in these environments.
The beaver is a keystone species in Canadian ecosystems, and preserving their dams is an ethical obligation aligned with Leave No Trace Canada principles.
– Leave No Trace Canada, Official Leave No Trace principles for respecting wildlife
Lake Louise vs. Moraine Lake: Which Is More Stunning for a Canoe Rental?
While the iconic glacial lakes of Banff National Park are flatwater environments, they can serve as valuable and inspiring training grounds for skills essential to whitewater. The question isn’t just about which is more beautiful—both are breathtaking—but about what each lake can teach you. From a technical paddling perspective, they offer different challenges and rewards that can help you refine your “river sense” and boat control before you ever enter a rapid.
Lake Louise offers a longer paddle, providing an excellent opportunity to build endurance and forward-stroke efficiency. The paddle to the Victoria Glacier at the far end of the lake and back is a significant workout. Moraine Lake, nestled in the Valley of the Ten Peaks, is more confined. This confinement can amplify the effects of wind, creating choppy conditions that are perfect for practicing your bracing strokes and directional control in waves. For anyone transitioning to whitewater, learning to stay stable and hold a line in chaotic water is an invaluable skill. Remember that even in mid-summer, the water in these lakes is just a few degrees above freezing, so bringing neoprene gloves is a wise precaution for hand comfort and grip.
The choice between them can be framed as a training decision. Do you want to work on your long-distance paddling engine, or do you want to practice your stability and responsiveness in challenging conditions? The table below outlines the key differences from a paddler’s point of view.
| Factor | Lake Louise | Moraine Lake |
|---|---|---|
| Paddling Distance | 4km to teahouse destination | 1.5km confined area |
| Wind Conditions | Moderate katabatic winds off Victoria Glacier | Amplified wind/wave effects due to confinement |
| Training Value | Long-distance endurance practice | Excellent for bracing and directional control in chop |
| Access Requirements | Parks Canada reservation needed | Mandatory shuttle service + reservation |
| Best Paddling Time | Early morning before 10am | Late afternoon after shuttle crowds |
Key Takeaways
- True whitewater mastery comes from developing “river sense”—a fluid dialogue with the current—not just memorizing strokes.
- Dynamic safety is a combination of practiced skills (like the wet exit), appropriate gear (like a wetsuit), and informed decisions based on real-time conditions.
- In Canada, preparation is paramount. This means understanding cold water physiology, respecting wildlife, and carrying reliable communication and safety equipment for remote areas.
Exploring Yukon’s Wilderness: The Safety Gear You Must Pack
As your skills progress from day trips on the Ottawa to multi-day expeditions on legendary rivers like the Yukon or Teslin, your concept of “dynamic safety” must evolve. In remote Canadian wilderness, you are your own rescue team. There is no room for error, and your gear is your lifeline. This goes far beyond the basic PFD and helmet; it involves redundancy, robust communication, and being prepared for the worst-case scenario. Two of the most critical pieces of gear for any Yukon expedition are a reliable method for emergency communication and the government-mandated safety equipment.
In areas with no cell service, your choice is between a Satellite Messenger (like a Garmin inReach or SPOT) and a Personal Locator Beacon (PLB). They serve different but complementary purposes. A PLB is a one-trick pony: it sends a distress signal to search and rescue services, but offers no two-way communication. A satellite messenger allows you to send and receive text messages, get weather updates, and trigger an SOS. For solo paddlers or small groups in the Yukon, a device with two-way communication is strongly recommended as it allows you to provide crucial details about your emergency to rescuers.
| Feature | Satellite Messenger (InReach/SPOT) | Personal Locator Beacon (PLB) |
|---|---|---|
| Two-way communication | Yes – text messaging capability | No – emergency signal only |
| Subscription required | Yes – monthly/annual plans | No – one-time purchase |
| Battery life | 2-4 days active tracking | 5+ years standby, 24hr transmission |
| Yukon SAR integration | Good – allows coordination messages | Direct – immediate response trigger |
| Cost | $400-600 + $15-50/month | $300-500 one-time |
Beyond communication, Transport Canada mandates specific safety equipment for any canoe on Canadian rivers. For the remote and challenging conditions of the Yukon, this list should be considered the absolute bare minimum.
Mandatory Transport Canada Safety Equipment for Yukon Rivers:
- A buoyant heaving line of at least 15 meters length.
- A bailer or manual bilge pump secured to the canoe.
- A sound-signalling device (a pealess whistle attached to your PFD is standard).
- Navigation lights if paddling between sunset and sunrise.
- Bear spray in a waterproof, accessible holster (ideally on your PFD).
- Bear-resistant food storage, such as certified barrels or Ursacks.
- An emergency shelter and fire-starting materials in a fully waterproof container.
Your journey to Class III proficiency begins not on the river, but with a commitment to mastering these safety fundamentals. Start today by auditing your current gear and skills against these professional standards, and practice every technique until it becomes an automatic, confident response in your conversation with the river.