The best RV for the Canadian Rockies isn’t the biggest or most luxurious, but the most agile one that grants you full access.
- Your vehicle’s size directly dictates your ability to access key roads, viewpoints, and trailheads in Banff and Jasper.
- Smaller RVs (under 27 feet) and truck campers fit into more campsites, including first-come, first-served spots, and are easier to handle on winding mountain roads.
Recommendation: For a first-time trip, prioritize ‘logistical freedom’ by choosing a smaller vehicle. What you lose in interior space, you gain in unparalleled access and spontaneity.
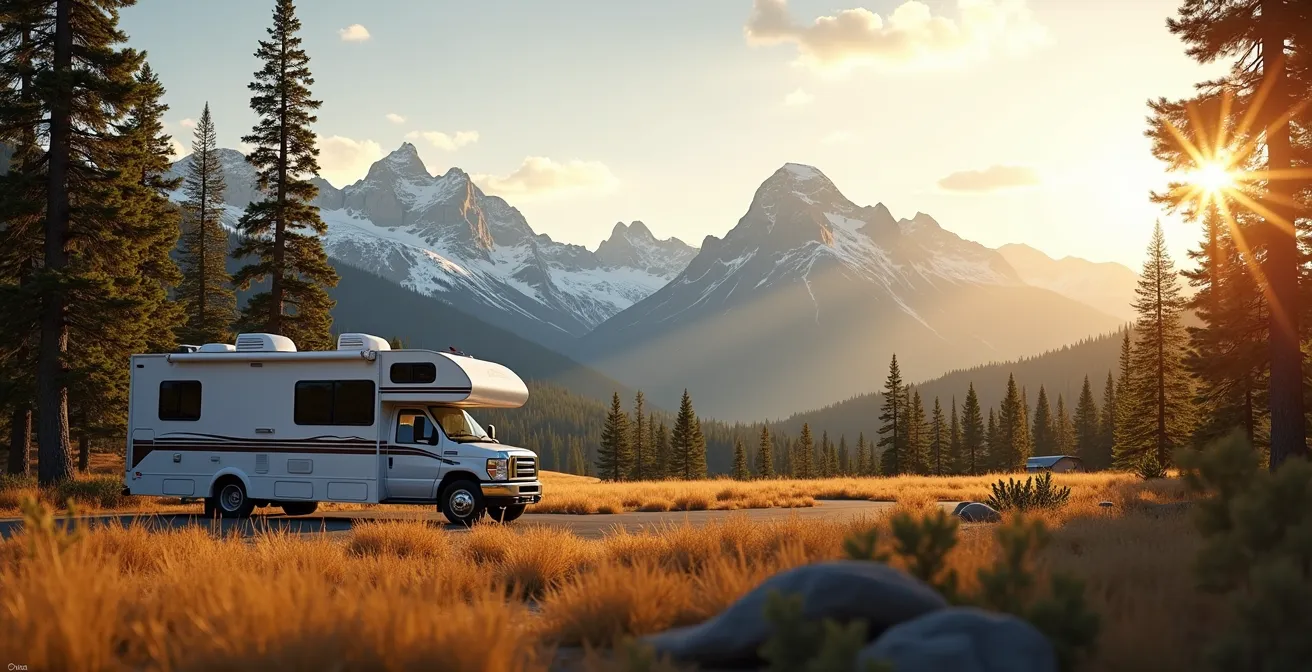
The vision is iconic: a comfortable motorhome parked by a turquoise lake, surrounded by the towering peaks of the Canadian Rockies. This dream drives thousands to rent an RV for the ultimate Banff and Jasper adventure. But a common oversight can turn this dream into a logistical nightmare: choosing a vehicle that is simply too large for the parks’ infrastructure. Many first-time renters focus on interior comfort, only to discover their oversized Class C motorhome can’t fit into desirable campsites, navigate tight scenic roads, or even park at popular trailheads.
Standard advice often revolves around booking early or packing correctly. While important, this misses the fundamental point. The real key to a successful Rockies RV trip isn’t just securing a spot, but securing the *right* kind of mobility. It’s a strategic decision that pits spaciousness against access. This guide departs from generic tips to offer a specialist’s perspective, focusing on what truly matters: matching your vehicle’s footprint to the physical constraints and opportunities within Parks Canada’s mountain parks.
We’ll adopt an “Access-First Planning” approach. Instead of asking “how much space do I need?”, we’ll ask “where do I want to go, and what vehicle will get me there?”. We will explore the hard realities of park regulations, the practicalities of campsite hookups, the physics of mountain driving, and the crucial link between vehicle size and your chances of experiencing that unforgettable wildlife encounter. This is not about sacrificing comfort; it’s about making an informed choice for a richer, less stressful, and more immersive adventure.
For those who prefer a condensed visual guide, the following video offers a fantastic overview of last-minute camping options like overflows, a crucial backup plan in the Rockies.
This article provides a detailed breakdown of the critical factors you need to consider before booking your RV rental. By understanding these logistical realities, you can plan a trip that maximizes your freedom to explore one of the most beautiful places on Earth.
Summary: A Strategic Guide to RV Sizing for Alberta’s National Parks
- Why Is “Boondocking” in National Parks Strictly Prohibited and Fined?
- How to Hook Up Water and Sewer at a Canadian Campsite for Beginners?
- Motorhome vs. Truck Camper: Which is Better for Windy Mountain Roads?
- The Hidden Fuel Cost: How Much Gas Does a Class C RV Really Guzzle?
- Reservation Launch Day: How to Secure a Spot When Sites Sell Out in Minutes?
- The 7:Why Toronto’s Skyline Changed Drastically in the Last 10 Years?
- The Essential Trunk Kit: What Tools Must You Have for a 5,000 km Trip?
- Banff or Jasper: Which National Park Is Better for Wildlife Viewing?
Why Is “Boondocking” in National Parks Strictly Prohibited and Fined?
The fantasy of pulling over on a quiet mountain road and camping for the night is a powerful one, but in Canada’s National Parks, it’s a costly mistake. “Boondocking,” or unserviced camping outside of designated campgrounds, is strictly illegal. This isn’t an arbitrary rule; it’s a core tenet of the parks’ conservation mandate. The delicate ecosystems of Banff and Jasper are vulnerable to human impact, from improper waste disposal to the risk of habituating wildlife to human presence, which often ends tragically for the animals.
Parks Canada wardens actively patrol for illegal campers. The consequences are not trivial; violators face immediate eviction and significant financial penalties. According to the National Parks of Canada Camping Regulations, fines for illegal camping can reach up to $5,000 CAD. This enforcement protects the environment and ensures a safe experience for both visitors and wildlife. The “leave no trace” principle is not a suggestion here; it is the law.
Fortunately, there are legal and affordable alternatives for those seeking a more rustic or last-minute option. Planning ahead is always best, but if you find yourself without a reservation, consider these options instead of risking a fine:
- Utilize Alberta’s designated Public Land Use Zones (PLUZs), such as the Ghost PLUZ west of Calgary, which permit random camping with the proper permit.
- Check for overflow camping at Parks Canada sites. These basic lots are offered for a nominal fee (around $10-15/night) when primary campgrounds are full.
- Explore campgrounds in Kananaskis Provincial Park or Bighorn Country, which border the national parks and often have better last-minute availability.
Understanding and respecting these rules is the first step in being a responsible visitor. The parks’ beauty is a shared resource, preserved only through collective adherence to these crucial regulations.
How to Hook Up Water and Sewer at a Canadian Campsite for Beginners?
Pulling into your first “full hookup” campsite can be intimidating. The array of hoses, valves, and connections seems complex, but the process is straightforward once you understand the basics. A full hookup site provides three essential services: fresh water, electricity, and sewer drainage (the “sani-dump”). Your rental company should provide a thorough orientation, which is the single most important part of your pickup process. Do not leave the lot until you are confident you can perform these tasks.
The process generally involves a few key steps. First, connect your drinking-water-safe (usually white) hose from the campsite’s water spigot to your RV’s “City Water” inlet. Always use a water pressure regulator to prevent damage to your RV’s plumbing. Next, connect the larger, corrugated sewer hose from your RV’s waste outlet to the in-ground sewer connection, ensuring a secure, airtight fit with a sewer elbow. Only open the black tank (toilet waste) valve when the tank is nearly full to ensure enough pressure to flush solids. The grey tank (sink/shower water) can often be left open for continuous drainage.
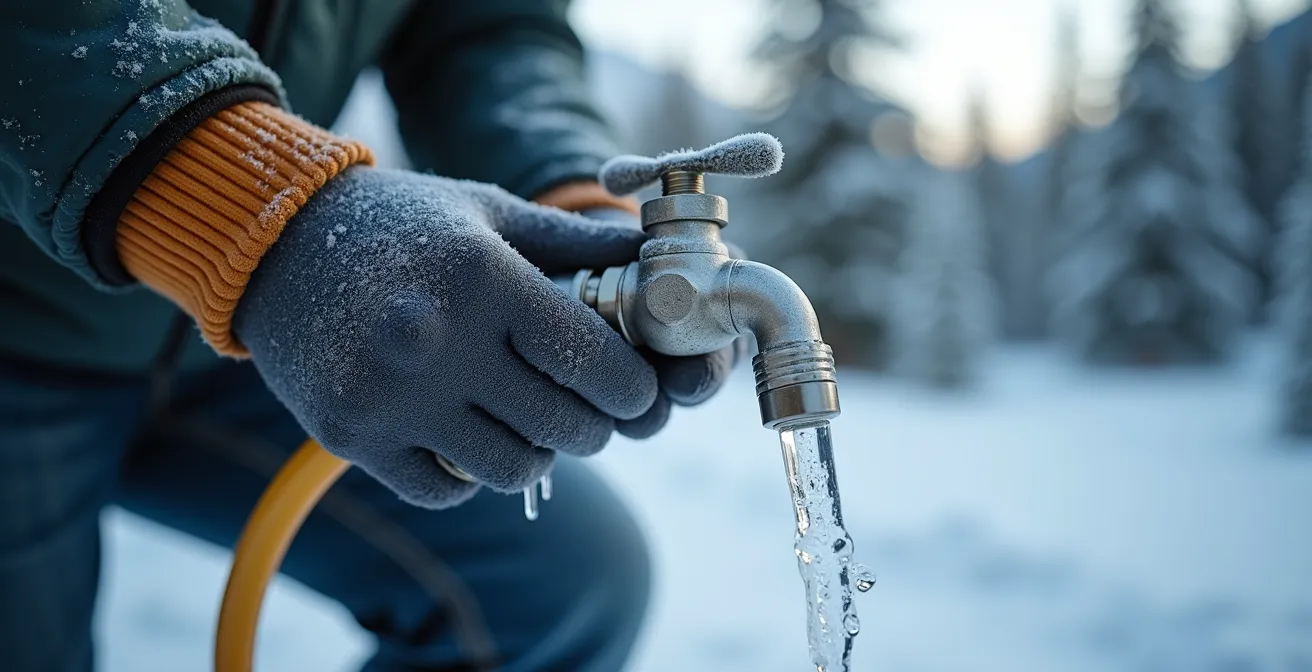
As the image suggests, performing these tasks in colder Canadian weather requires sturdy gloves and a bit of practice. The key is to be methodical and ensure every connection is tight before turning on any valves. A great example of industry best practice comes from rental companies’ own procedures.
Case Study: RV Rental Orientation in Calgary
Major rental companies like CanaDream in Calgary provide meticulous vehicle orientations. Their staff demonstrate how to connect all hoses, explain the need for specific adapters, and point out quirks for each RV model. They provide maps of approved sani-dump stations for use before returning the vehicle, such as the Flying J Travel Plaza on Barlow Trail SE, and recommend filling fresh water tanks at designated stations near their depot to ensure water quality.
This initial walkthrough is your best friend. Pay close attention, take notes, and ask questions. A few minutes of focused learning at the rental depot will save you from a world of messy trouble at the campsite.
Motorhome vs. Truck Camper: Which is Better for Windy Mountain Roads?
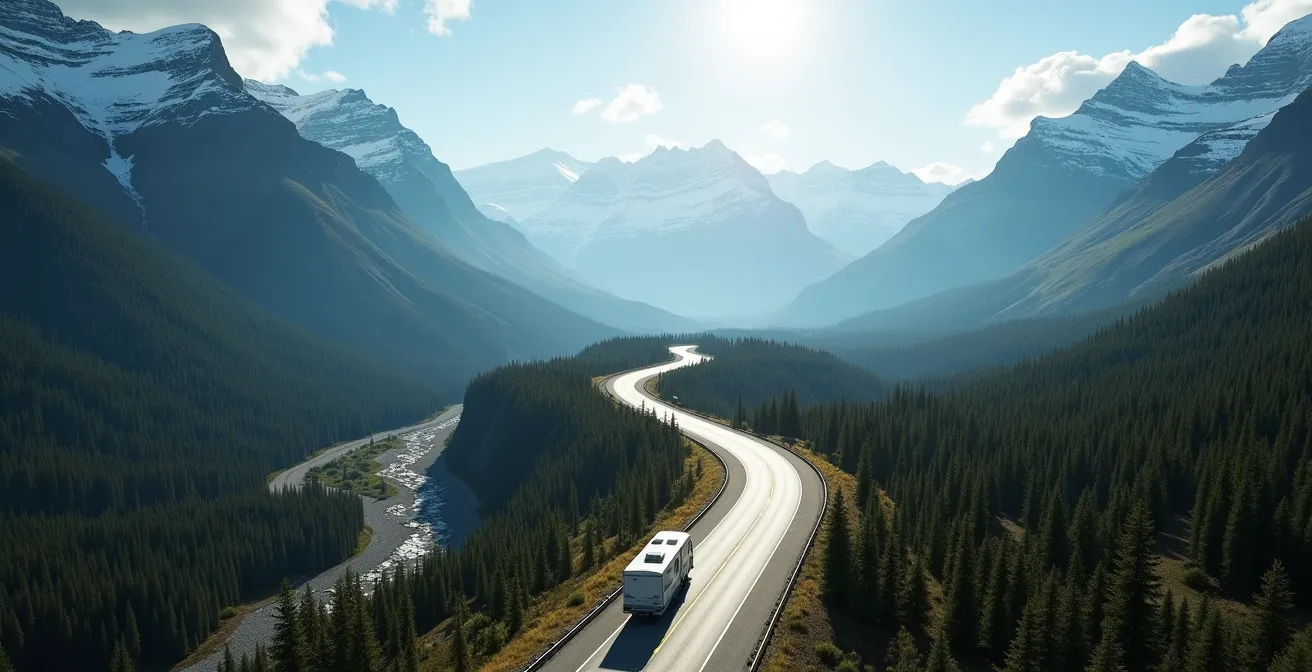
The choice between a Class C motorhome and a truck camper is a defining one for your Rockies trip, especially when considering the region’s demanding driving conditions. While a motorhome offers integrated living space and convenience, a truck camper provides superior agility and stability, particularly on the windy, high-altitude roads like the Icefields Parkway. The primary difference lies in their center of gravity.
A Class C motorhome, built on a van chassis, has a higher profile and a higher center of gravity. This makes it more susceptible to crosswinds, which can be intense and unpredictable in mountain passes. Driving one requires constant vigilance and can be more fatiguing over long distances. In contrast, a truck camper, which sits in the bed of a heavy-duty pickup, has a much lower center of gravity. This inherent stability makes it feel more planted on the road, inspiring greater confidence on steep grades and sharp curves.
This difference in “vehicle footprint” extends beyond driving. A smaller, more maneuverable truck camper can access viewpoints and trailheads that are simply off-limits to a larger motorhome. This logistical freedom can be the difference between watching a grizzly from a crowded roadside stop and finding a quiet pullout for a more intimate viewing. Detachability is another major advantage; you can unhitch the camper at your site and use the truck for day trips, a luxury not available with a motorhome.
This table breaks down the key differences for driving in the Alberta mountains, based on data from various driver experiences.
| Factor | Truck Camper | Class C Motorhome |
|---|---|---|
| Center of Gravity | Lower – better stability | Higher – more wind susceptible |
| Icefields Parkway Access | Can access all viewpoints | Limited by size at some stops |
| Campsite Options | Fits sites up to 27 feet | Requires 30+ foot sites |
| Detachability | Can unhitch for day trips | Must drive entire unit |
| Driver Fatigue | Less tiring on mountain grades | More demanding to drive |
For first-timers prioritizing access and ease of driving over interior space, the truck camper often presents a more strategic choice for navigating the unique challenges of the Canadian Rockies.
The Hidden Fuel Cost: How Much Gas Does a Class C RV Really Guzzle?
When budgeting for an RV trip, many renters focus on the nightly rental fee. While significant, it’s often the hidden cost of fuel that delivers the biggest shock. A typical Class C motorhome is a notoriously thirsty vehicle, and the demanding terrain of the Canadian Rockies only exacerbates the issue. While RVezy reports the average Alberta RV rental starts at $158 CAD/night, your fuel bill for a week-long trip can easily match or exceed that amount.
A standard Class C RV might get 25-35 L/100 km (8-10 miles per gallon) on a flat highway. However, you are not driving on a flat highway. The steep, long grades of mountain passes can increase fuel consumption dramatically. It’s realistic to budget for a 25-30% increase in fuel use when calculating your costs for a trip through Banff and Jasper. This means your effective fuel economy could drop to as low as 40 L/100 km (6 mpg).
Beyond consumption, you must plan for fuel availability. The 232-kilometre stretch of the Icefields Parkway between Lake Louise and Jasper has only one gas station at Saskatchewan River Crossing, where prices are substantially higher. A well-thought-out fuel strategy is not optional; it’s essential.
Fuel Planning for a Calgary-Rockies Loop
A smart fuel plan for a 7-day loop from Calgary involves several strategic stops. First, fill the tank completely in Calgary, where gas prices are typically the lowest in the region. Plan a top-up in Banff or Canmore before heading north onto the Icefields Parkway. This will give you enough range to comfortably reach Jasper without having to pay the premium price at the midway point. On the return journey, fill up in Jasper or Hinton before the long drive back east. This simple strategy can save you over a hundred dollars on a single trip.
Treating fuel as a primary logistical challenge, rather than an afterthought, is crucial. By budgeting realistically and planning your stops, you can prevent a nasty surprise at the pump and keep your adventure on track.
Reservation Launch Day: How to Secure a Spot When Sites Sell Out in Minutes?
Securing a campsite in Banff or Jasper for July or August can feel like trying to get concert tickets for a superstar. Prime spots in campgrounds like Tunnel Mountain Village or Whistlers can be fully booked for the entire summer within minutes of the reservation system opening. Parks Canada typically allows campground reservations to be made up to 6 months in advance, and being prepared for “launch day” is your only real shot at getting your first choice.
Success on reservation day is not about luck; it’s about preparation and speed. The system is notoriously prone to crashing under the heavy load, and every second counts. You are competing against thousands of other hopeful campers, all clicking for the same limited inventory. The booking window is short—if you don’t complete your transaction within about 20 minutes, the sites in your cart are released back into the pool. This means you need a “war room” mentality and a clear plan of attack.
Having your account set up, your preferred sites identified, and backup options ready is non-negotiable. Many seasoned campers use multiple browser tabs or even multiple people to maximize their chances. One common strategy is to book the maximum allowable stay initially to secure a block of dates, and then go back into the system days later to modify the reservation to your exact desired length. This is easier than trying to book a precise 4-day stay amidst the initial frenzy.
To give yourself the best possible chance, follow a precise pre-launch and launch-day protocol. Treat it like a mission, because for a prime summer spot, it is.
Your Parks Canada Reservation Launch Day Checklist
- Create your Parks Canada account weeks in advance, ensuring all vehicle, personal, and payment details are saved and up-to-date.
- Log into your account at 7:55 AM Mountain Time; reservations open precisely at 8:00 AM MT. Be ready.
- Open multiple browser tabs for each of your top-choice campgrounds (e.g., one for Tunnel Mountain, one for Two Jack, one for Whistlers).
- Have a written list of backup dates and at least three backup campgrounds in case your first choices are gone instantly.
- Once you have a site in your cart, complete the booking immediately. You only have a 20-minute window before the system times out and releases your spot.
- Consider booking the maximum stay allowed for your desired start date, then modify the reservation later to shorten your stay if needed.
This level of preparation may seem extreme, but it’s the reality of securing a piece of paradise during peak season. A few minutes of strategic planning can make the difference between your dream trip and a summer of disappointment.
The 7:Why Toronto’s Skyline Changed Drastically in the Last 10 Years?
At first glance, this question seems out of place in a guide to RVing in the Rockies. But it serves as a powerful metaphor for understanding the single most important constraint of our National Parks: finite space. Toronto’s skyline has exploded vertically because when demand for space increases in a city, you can build up. New condos and office towers rise from the same footprint, accommodating more people on the same amount of land. The parks have no such luxury.
The “skyline” of Banff and Jasper—the number of campsites, parking stalls, and the width of their roads—is essentially fixed. Environmental protections and geographical boundaries mean you cannot simply pave another 1,000 campsites when demand surges. The park’s footprint is legally and ecologically defined, and its capacity is a hard limit. This is the core reason why planning, reservations, and vehicle size are so critical.
As the Parks Canada Conservation Guidelines for development highlight, the priority is always resource protection over visitor convenience. This principle is perfectly captured in an analysis of park capacity.
Unlike urban areas that can build vertically to accommodate demand, National Parks have fixed boundaries and strict environmental protections that limit campground expansion.
– Parks Canada Conservation Guidelines, Banff and Jasper Camping Capacity Study
So, while Toronto’s skyline changes to meet demand, the “skyline” of the parks cannot. You are entering a system with a fixed number of slots. The entire game is about figuring out how to best fit into one of them. This is why a smaller, more agile vehicle—one with a smaller “vehicle footprint”—gives you a massive strategic advantage. It allows you to fit into more of the limited slots available, whether it’s an oddly shaped campsite, a small pullout for a photo, or the last remaining spot at a trailhead. Thinking about the parks’ unchangeable nature reframes the entire planning process.
The Essential Trunk Kit: What Tools Must You Have for a 5,000 km Trip?
While your RV rental will come with a basic kit, a 5,000 km journey through the remote and rugged Canadian Rockies demands a few essential additions. The supplied kit may cover the bare minimum, but it won’t account for the unique challenges of mountain travel, from notoriously uneven campsites to vast stretches with no cell service. Being self-sufficient is not just a convenience; it’s a matter of safety.
Before leaving the rental depot, do a thorough inventory. Ensure you have the basics: a functional tool kit, leveling blocks, and the necessary water and sewer hoses. Anything beyond that is likely your responsibility. Companies like Fraserway RV are transparent about this; they provide comprehensive base equipment but expect renters to budget for supplementary gear. A reasonable estimate is an additional $200-300 CAD for crucial items that are not included in a standard rental package.
Your first stop after picking up your RV should be a store like Canadian Tire in Calgary or Canmore to build out your essential trunk kit. Certain items are non-negotiable for a Rockies trip.
- Bear Spray: This is mandatory. Know how to use it and carry it on every hike. It is your last line of defense in a close encounter.
- Extra Leveling Blocks: Many Parks Canada campsites are beautiful but far from level. Having extra blocks can be the difference between a good night’s sleep and sleeping on a slant.
- Dedicated GPS Unit: Do not rely on your phone. Most of the Icefields Parkway and many other scenic drives have zero cell reception. A dedicated GPS with pre-loaded maps is essential.
- Firewood: Transporting firewood between regions is prohibited to prevent the spread of invasive species. Buy your firewood bundles at the park entrance or local stores.
- Warm Blankets and Mosquito Repellent: Even in August, mountain nights can drop to near-freezing temperatures. And the mosquitos, especially near water, can be relentless. Be prepared for both.
This curated kit, assembled before you head into the mountains, provides a crucial layer of comfort and safety, allowing you to handle the small, inevitable challenges of the road without derailing your adventure.
Key Takeaways
- Vehicle size is the #1 factor determining your access to campsites, trailheads, and viewpoints in Banff and Jasper.
- A smaller RV or truck camper (under 27 ft) offers greater “logistical freedom” and stability on windy mountain roads.
- Book campsites the morning they are released (up to 6 months in advance) and have multiple backup plans ready.
Banff or Jasper: Which National Park Is Better for Wildlife Viewing?
This is a classic debate among Rockies travelers, but the answer often depends less on the park and more on your vehicle. Both Banff and Jasper offer world-class wildlife viewing opportunities, but your ability to capitalize on them is directly tied to your “roadside agility.” The best sightings—a black bear foraging on a hillside, a herd of elk crossing a meadow—often happen unexpectedly along secondary roads and require the ability to pull over quickly and safely. This is where a smaller vehicle footprint provides a decisive advantage.
In Banff, scenic routes like the Bow Valley Parkway are prime wildlife corridors. However, their pullouts are small and often crowded. A large, 30+ foot motorhome will struggle to find a safe spot, often having to pass by a sighting. In Jasper, many of the best secondary roads for spotting animals, such as the route to the Valley of the Five Lakes, have size restrictions that make them inaccessible to larger RVs. With a truck camper or a small Class B or C, you can explore these quieter roads where wildlife is often more abundant.
The timing of wildlife activity is also a factor. Animals are most active at dawn and dusk. In a large, cumbersome RV, setting out for an early morning drive is a major undertaking. A smaller, more nimble vehicle allows for stealthy and quick positioning, increasing your chances of being in the right place at the right time. Ultimately, the park with “better” wildlife viewing is the one you can more thoroughly and safely explore.
This table illustrates how vehicle size directly impacts your access to prime wildlife viewing areas in both parks.
| Park Feature | Large RV (30+ ft) | Small RV/Truck Camper |
|---|---|---|
| Bow Valley Parkway (Banff) | Difficult pullouts | Easy access to all viewpoints |
| Jasper secondary roads | Many restrictions | Full access including Valley of Five Lakes |
| Wildlife corridor parking | Limited spaces | Can use car-sized spots |
| Dawn/dusk mobility | Slow, conspicuous | Quick, stealthy positioning |
| Campsite availability | Must book months ahead | Can use walk-in sites |
By choosing a vehicle that grants you maximum access, you are not just choosing a mode of transport; you are choosing to multiply your opportunities for those magical, once-in-a-lifetime wildlife encounters. In this context, logistical freedom is the ultimate luxury.
Now that you understand the critical link between vehicle size and park access, you are equipped to make a strategic choice. Instead of defaulting to the largest vehicle available, start your planning process by considering the freedom a smaller footprint provides. Evaluate your priorities, plan your routes, and book an RV that will enhance, not hinder, your exploration of the Canadian Rockies.