The solution to overweight luggage for multi-sport trips isn’t better packing cubes—it’s a complete shift from a gear list to a modular system.
- Prioritize gear that serves multiple functions across different activities and weather conditions.
- Sequence your activities to rotate muscle group demands, preventing burnout and maximizing recovery.
- Adopt a hybrid “bring vs. rent” model, flying only with fit-critical items like your shoes and saddle.
Recommendation: Stop thinking about packing lists. Start designing an integrated gear and energy system to unlock more adventure with less baggage.
The moment of truth at the airport check-in counter: the scale flashes a number that sinks your heart and empties your wallet. For the ambitious adventurer planning a Canadian multi-sport trip—paddling through Algonquin’s lakes one day, hiking the Rockies the next—this scenario is all too common. You’re forced to choose between leaving critical gear behind or paying exorbitant overweight baggage fees. The standard advice of “packing layers” and “using packing cubes” feels painfully inadequate when you’re staring at a pair of bulky hiking boots, a paddle, and a climbing helmet.
These generic tips fail because they treat packing as a simple inventory problem. They don’t address the fundamental conflict of needing specialized, often heavy, gear for disparate activities. You are told to be versatile, but the gear itself is not. This is the classic packing paradox that leads to overpacking, stress, and unnecessary expense. The common solutions are just bandages on a flawed process.
But what if the key wasn’t in how you fold your clothes, but in how you think about your gear as a whole? The secret to conquering the multi-sport packing challenge lies in shifting from a list-based approach to a system-based one. It’s about creating a cohesive, modular ecosystem of gear where every item is chosen not just for one activity, but for its role within your entire adventure’s energy system and environmental context. This is not about deprivation; it’s about strategic intelligence.
This guide will walk you through that system. We will deconstruct the problem from the ground up, starting with your footwear and moving through activity sequencing, rental strategies, and the macro-logistics of travel across Canada’s vast landscapes. Prepare to rethink everything you thought you knew about packing.
Summary: Your Blueprint for Lightweight Multi-Sport Canadian Travel
- Hiking Boots vs. Trail Runners: Which Works Better for Portages?
- The Fatigue Wall: How to Sequence Activities to Avoid Burnout on Day 3?
- Rent or Bring: Is It Cheaper to Fly with a Bike or Rent Locally?
- The Itinerary Trap: Why You Should Leave 20% of Your Time Unscheduled?
- Why Does Switch-Tasking Between Sports Keep Your Brain More Alert?
- Ultralight Gear: How to Cut 5 lbs from Your Base Weight for 7 Days?
- Yurt vs. Cabin: Which Offers Better Insulation for a Fall Retreat?
- Driving the Trans-Canada Highway: How to Plan Fuel Stops in Remote Areas?
Hiking Boots vs. Trail Runners: Which Works Better for Portages?
The first and most impactful decision in your multi-sport packing system happens at your feet. For decades, traditional wisdom dictated that heavy, waterproof hiking boots were non-negotiable for serious treks. For a trip involving both hiking and paddling, this creates an immediate crisis of bulk and weight. The solution is clear and backed by decades of field experience: ditch the boots for trail runners.
The evolution of long-distance hiking footwear reveals a definitive shift. Experienced backpackers now almost exclusively use low-cut, non-waterproof trail runners. The weight savings are dramatic: a 40% reduction compared to modern composite boots, and even more against traditional leather boots. This matters immensely, as studies consistently show that weight on your feet is significantly more fatiguing than weight on your back.
For the specific challenge of a Canadian portage—hauling a canoe over slick, mossy Canadian Shield granite—trail runners excel. Their flexible soles offer better ground-feel and superior grip on uneven surfaces. While “waterproof” boots sound appealing, they are a trap on a water-based trip. Once wet, they take days to dry, leading to blisters and discomfort. Non-waterproof trail runners, in contrast, get wet instantly but also drain and dry in a fraction of the time, especially in a breezy campsite. Their flexibility also means they require virtually no break-in period, unlike the rigid structure of boots.
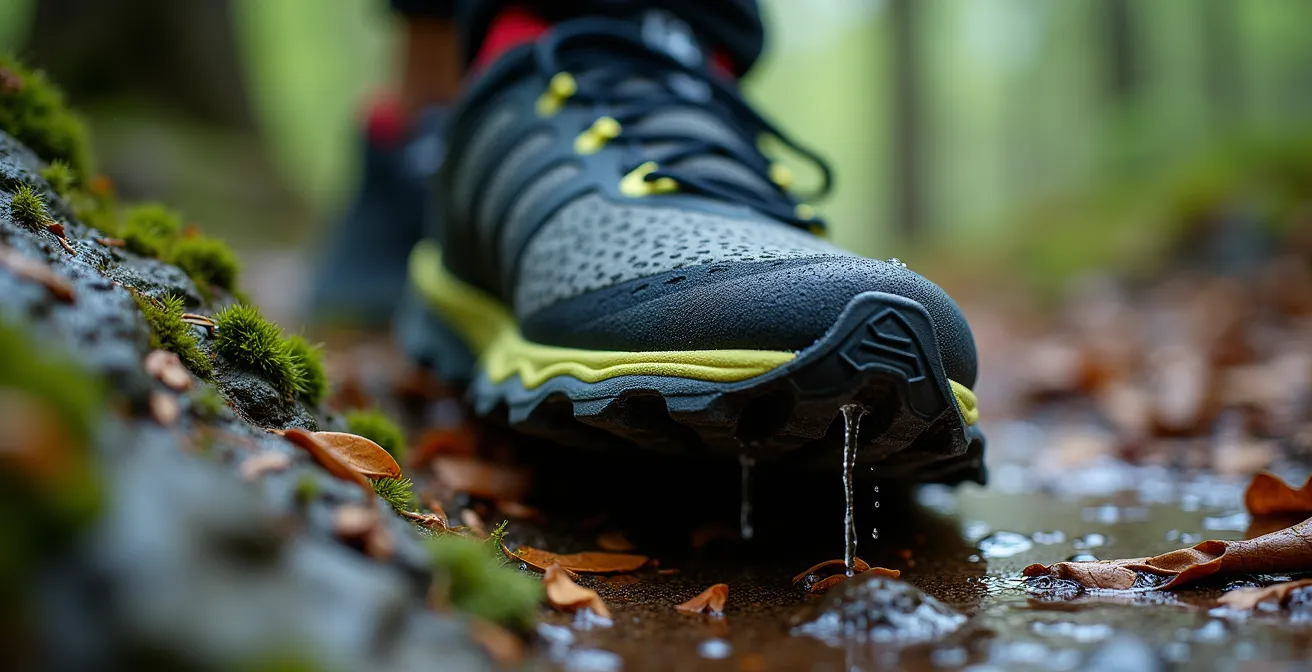
As the image above demonstrates, the aggressive tread and pliable rubber of a modern trail runner is engineered for precisely this kind of terrain. It engages with the slick surface, providing the confidence needed when you’re off-balance under the weight of a canoe. For the multi-sport adventurer, the choice is not just about comfort, but about efficiency, safety, and rapid recovery. Trail runners are the cornerstone of a lightweight, adaptable system.
The Fatigue Wall: How to Sequence Activities to Avoid Burnout on Day 3?
Packing light is only half the battle; managing your body’s energy is the other. Many multi-sport trips end in premature exhaustion because they are planned around locations, not physiology. The dreaded “Day 3 Fatigue Wall” is often the result of consecutively stressing the same muscle groups without adequate recovery. A smarter approach is to think like a strength coach and sequence activities to rotate physiological demands.
Instead of a grueling three-day hike followed by a paddle, alternate between lower-body dominant and upper-body dominant sports. A day of intense hiking in the Rockies primarily taxes your legs and cardiovascular system. The following day, a long paddle on a calm lake allows your legs to actively recover while your core and upper body do the work. This rotation is the key to endurance over a week-long or multi-week adventure.
This strategy also allows for more targeted recovery efforts. After a long paddle, focus on stretching your shoulders and back. After a big hike, you can focus on lower body care. While intensive methods exist, simple, targeted stretching and rest are often enough. As some research on winter sports recovery shows that massage and cold-water immersion demonstrate significant benefits, even a quick dip in a cold Canadian lake can aid muscle recovery after a hike.
The following table provides a sample rotation strategy for a trip in the Banff area, illustrating how to balance high-intensity days with active recovery by alternating the primary muscle groups used.
| Day | Primary Activity | Muscle Groups Used | Recovery Focus |
|---|---|---|---|
| Day 1 | Paddling (Bow River) | Upper body, core | Lower body rest |
| Day 2 | Hiking (Lake Louise) | Lower body, cardiovascular | Upper body recovery |
| Day 3 | Light paddling | Moderate upper body | Active recovery |
| Day 4 | Trail running | Lower body explosive | Upper body continues recovery |
Rent or Bring: Is It Cheaper to Fly with a Bike or Rent Locally?
For sports requiring large, specialized gear like cycling, the “rent or bring” dilemma is a major logistical and financial hurdle. The minimalist expert’s answer is rarely all or nothing; it’s a hybrid model. The core principle is to differentiate between generic equipment and “fit-critical” personal items. You rent the frame, but you bring the components that directly impact your comfort, performance, and safety.
Flying with a bicycle in Canada involves significant costs that go beyond the simple ticket price. A cost analysis shows that most major Canadian airlines charge passengers $50 per bicycle each way, with budget carriers like Lynx charging up to $112.99. This means a round trip can cost anywhere from $100 to over $220. This doesn’t even include the cost of a durable bike box ($50-$150) or the hassle of disassembly and reassembly at your destination.
Renting a high-performance bike in a destination like Whistler or the Okanagan might cost $80-$120 per day. For a short trip, flying seems cheaper. But for a longer trip, rental costs add up. The hybrid model offers the best of both worlds. You pack your own helmet, shoes, pedals, and saddle—the items your body is accustomed to—in your regular checked luggage. This avoids all specific bike handling fees. Upon arrival, you rent a quality bike frame and have the local shop install your personal components, ensuring a near-perfect fit without the exorbitant costs and logistical nightmares of flying with a full bike.
Action Plan: Implementing the Hybrid Bike Rental Model
- Fit-Critical Items: Pack only your personal helmet, shoes, pedals, and saddle in your standard luggage.
- Advance Booking: Research and book a suitable rental bike frame at your destination at least two weeks in advance.
- Avoid Fees: By packing only components, you completely avoid specific airline bicycle handling fees.
- Destination Choice: Prioritize destinations with strong rental infrastructure, such as Whistler, BC, or Canmore, AB.
- Insurance Check: Compare the cost of rental insurance against your personal bike’s travel insurance policy.
The Itinerary Trap: Why You Should Leave 20% of Your Time Unscheduled?
In the excitement of planning, there’s a temptation to schedule every hour of a trip, creating a rigid, back-to-back itinerary. This is the “itinerary trap,” and in a country as vast and unpredictable as Canada, it’s a recipe for failure and frustration. The expert approach is to build in a significant “contingency buffer” by intentionally leaving at least 20% of your time unscheduled.
This unscheduled block is not empty time; it’s your strategic reserve. It’s the space you need to adapt to the realities of Canadian travel. A single-lane bridge into Tofino can get backed up for hours. BC Ferries can experience cancellations due to high winds. Most critically, vast wilderness areas are subject to sudden closures. The summer of 2023 saw massive forest fires in British Columbia and Alberta, forcing last-minute route changes for thousands of travelers. A tight schedule would be completely derailed by such an event, but a flexible one can adapt and find a new adventure.
This buffer time also allows for serendipity. You might hear from a park ranger about a stunning, unlisted trail that just opened up. You might discover a local festival. This is often where the most memorable moments of a trip happen. Having that flexibility allows you to say “yes” to unexpected opportunities without the stress of abandoning a prepaid, tightly scheduled activity.

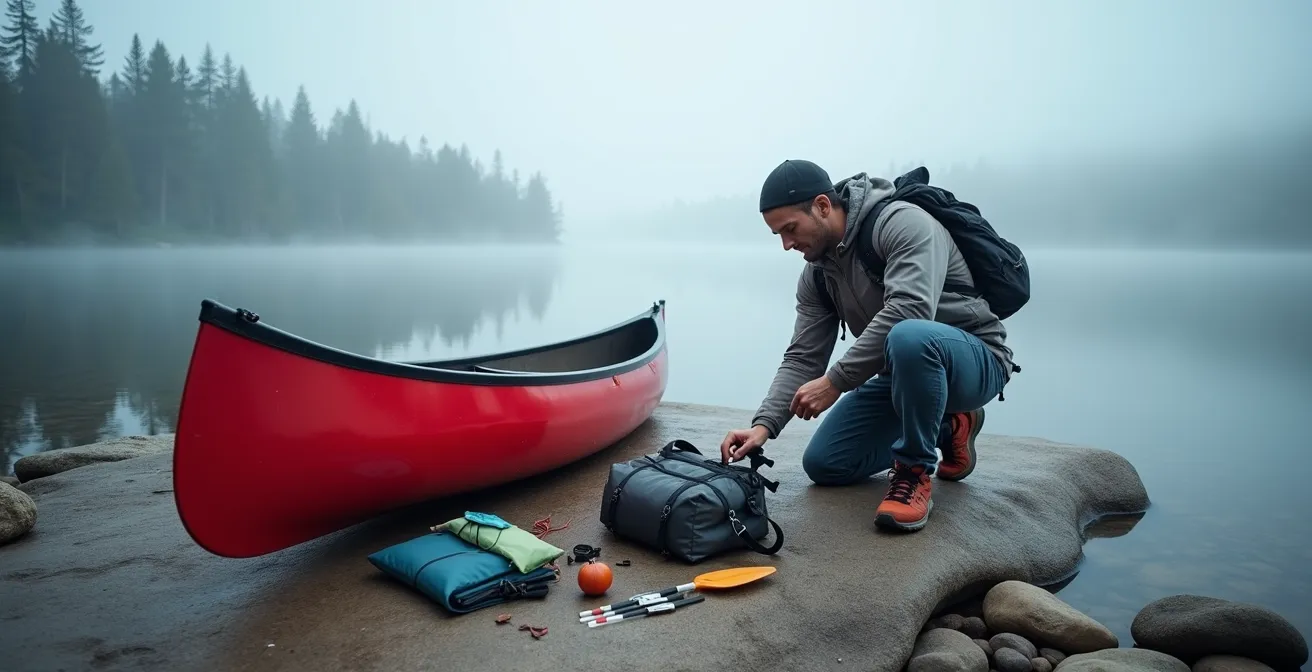
As this image suggests, true adventure planning is a dynamic process. It’s about having a solid plan but also being prepared to adapt it based on new information and conditions. Consulting with local experts like park rangers before heading out is crucial, and having a time buffer makes it possible to act on their advice. This 20% buffer is your insurance against the unpredictability of nature and the key to a more relaxed, resilient, and rewarding journey.
Why Does Switch-Tasking Between Sports Keep Your Brain More Alert?
Sequencing different sports isn’t just a strategy for physical recovery; it’s also a powerful tool for maintaining mental sharpness and engagement. The monotony of performing the same motion for days on end—whether it’s the rhythm of hiking or the stroke of a paddle—can lead to a form of mental fatigue. Switch-tasking between sports acts as a cognitive reset, keeping your brain more alert and responsive.
The science behind this relates to the nature of neuromuscular fatigue. Different activities place unique demands on the brain-to-muscle pathways. Hiking on a rocky trail requires constant micro-adjustments in balance and foot placement, engaging proprioceptive and spatial awareness parts of the brain. Paddling, on the other hand, demands rhythmic coordination between the core, back, and arms, with a focus on maintaining a consistent heading and reading the water’s surface.
When you switch from one sport to another, you’re not just resting a set of muscles; you’re engaging a new set of neural circuits. This novelty prevents the mental burnout associated with repetitive tasks. It forces your brain to solve new problems, process different sensory inputs, and execute different motor patterns. This is why a short, intense trail run can feel surprisingly refreshing after two days of monotonous paddling, even though it is physically demanding.
This concept is supported by research into athletic performance, which highlights the specific nature of fatigue. As one research team notes:
The development of neuromuscular fatigue may be task-dependent, which explains why using task-specific conditions can be more helpful to understanding the evolution of fatigue in response to exercise demands that are repetitive.
– Sports Medicine Research Team, Trends Assessing Neuromuscular Fatigue in Team Sports
By building variety into your itinerary, you are actively managing both physical and cognitive fatigue. This leads to better decision-making, heightened awareness of your surroundings (which is critical for safety in the wilderness), and a richer, more engaging overall experience of your adventure.
Ultralight Gear: How to Cut 5 lbs from Your Base Weight for 7 Days?
Cutting significant weight from your pack isn’t about leaving essentials behind; it’s about a ruthless “redundancy audit” and embracing a modular gear system. The goal is to get your base weight—the weight of your pack minus consumables like food, water, and fuel—as low as possible. For a 7-day trip, getting under 15 lbs (6.8 kg) is an achievable goal. Cutting the first 5 lbs (2.3 kg) comes from targeting the “big three”: your shelter, your sleeping system, and your pack itself.
Start by switching to gear from ultralight Canadian brands like Durston Gear, whose tents and packs are legendary for their low weight and high performance. A modern ultralight tent can save you 2-3 lbs over a standard backpacking tent. Next, analyze your sleeping system. Replacing a standard inflatable sleeping pad with a closed-cell foam pad can save 200-400g and offers foolproof durability. Then, conduct a redundancy audit on your clothing. Do you need a separate wind jacket and rain jacket, or can one high-quality, breathable rain shell do both jobs?
The final pounds are shed through meticulous, gram-by-gram optimization. Repackage all food from its bulky commercial packaging into simple zip-lock bags. This alone can save a surprising amount of weight and space. Calculate your exact fuel needs to avoid carrying a full, unnecessary canister; for simple boiled meals, 8g of fuel per person per day is a good baseline. Lastly, revisit your footwear choice. As studies show weight on feet fatigues you much more than weight on your back, choosing trail runners under two pounds is one of the highest-impact weight-saving decisions you can make.
However, an ultralight approach in Canada requires some non-negotiable additions. Your pack must always contain mandatory safety gear: a robust rain shell for unpredictable weather, effective bug protection (a head net is essential), and, in many regions, bear spray and/or a bear-resistant food canister. The goal of ultralight is not to compromise safety, but to eliminate everything that doesn’t directly contribute to safety or survival.
Yurt vs. Cabin: Which Offers Better Insulation for a Fall Retreat?
Your choice of accommodation is another component of your multi-sport system, especially during a Canadian fall retreat where temperatures can drop and weather can be damp. While both yurts and cabins offer a step up from a tent, they serve very different functions for the active traveler. When it comes to insulation and, more importantly, gear management, the hard-sided cabin is unequivocally superior.
Yurts, particularly those found in Quebec’s SEPAQ parks, are fantastic structures offering a unique connection to the outdoors. Their canvas walls, however, offer limited insulation against sound and cold. While often equipped with a propane or wood stove, they struggle to combat the pervasive dampness of a fall day. Cabins, like those standard in many Ontario Parks, are typically better insulated and almost always feature a powerful wood stove.
This heating source is the critical difference. As the Parks Canada Planning Team notes, the ability to dry wet gear is paramount.
The primary advantage of a cabin in damp Canadian fall weather is its ability to dry wet gear effectively with a wood stove, which is infinitely better for drying soaked paddling equipment than the humid interior of a yurt.
– Parks Canada Planning Team, Trip Planning Tools – Parks Canada
After a day of paddling in the rain, being able to hang your gear near a crackling wood stove means you can start the next day dry, warm, and comfortable. Attempting to dry the same gear in the higher humidity of a yurt is a slow, often futile process. The cabin’s hard-sided structure also offers superior protection and insulation from wildlife sounds, leading to a more restful night’s sleep before another big day.
| Feature | Ontario Parks Cabins | SEPAQ Yurts (Quebec) |
|---|---|---|
| Heating Source | Wood stove standard | Propane or wood varies by location |
| Gear Drying Capacity | Excellent with wood stove | Limited, higher humidity |
| Wildlife Sound Insulation | Superior hard-sided protection | Canvas walls transmit sounds |
| Fall Availability | Open through October | Select locations year-round |
| Average Nightly Cost | $100-150 CAD | $95-125 CAD |
Key Takeaways
- System Over List: Ditch the traditional packing list. Design a modular gear system where items serve multiple functions across different activities.
- Sequence for Energy: Plan your itinerary by rotating muscle group demands (e.g., lower-body hiking one day, upper-body paddling the next) to prevent burnout.
- Embrace the Buffer: Leave 20% of your schedule unplanned as a strategic contingency for weather, road closures, and spontaneous adventures specific to Canadian travel.
Driving the Trans-Canada Highway: How to Plan Fuel Stops in Remote Areas?
The final piece of the multi-sport puzzle is macro-logistics, and in Canada, that means confronting the sheer scale of the country. Driving the Trans-Canada Highway is an adventure in itself, but it requires a level of planning unfamiliar to those used to more densely populated regions. To avoid being stranded, you must adopt a “Last Chance Fuel” strategy, especially when traversing remote sections in Ontario, the Prairies, and the mountain passes of BC.
The distance between service stations can be vast. For example, the stretch of Highway 17 between Wawa and Thunder Bay in Northern Ontario runs for nearly 480km with extremely limited services. Assuming your vehicle can handle this is a rookie mistake. The rule is simple: if you see a gas station in a town like Wawa or Marathon, you fill up, regardless of how much fuel you think you have left. This principle is even more critical in the mountains, where steep inclines in places like Rogers Pass (BC) will cause your vehicle to consume fuel much faster than on flat ground. Your last reliable fuel stops before the pass are Golden (eastbound) or Revelstoke (westbound).
This level of planning is essential to even attempt a cross-country journey. To put it in perspective, experienced road trippers recommend at least three weeks minimum to drive from coast to coast, with a couple of months being ideal to truly explore. Your fuel plan is the backbone of that itinerary. Here are some key corridors to be aware of:
- Wawa to Thunder Bay (ON): Fill up in Wawa. This 480km stretch is one of the most isolated on the entire highway.
- Rogers Pass (BC): Your last chance for fuel is Revelstoke (westbound) or Golden (eastbound). Mountain driving consumes more fuel.
- Lake Superior Provincial Park (ON): Marathon is the last major fuel stop if you are heading northbound along the lake.
For those with electric vehicles, this planning becomes even more critical. Use charging stops strategically as opportunities for micro-adventures. A 30-60 minute charge at a scenic viewpoint can be the perfect window for a short hike or a picnic, integrating your travel logistics with your adventure goals.
Ultimately, minimalist multi-sport packing is not about what you leave behind, but about the freedom you gain. By adopting a systemic, intelligent approach to your gear, your energy, and your logistics, you transform packing from a stressful chore into a strategic advantage. You move faster, feel better, and open yourself up to more of the spontaneous beauty that Canadian adventures have to offer. Apply this systems-thinking to your next trip plan and discover how much more you can experience when you aren’t weighed down by your baggage.