
The secret to a successful coastal hike isn’t staying dry—it’s managing the inevitable wetness with a ‘quick-dry’ system.
- Expensive ‘breathable’ rain gear often fails in 100% humidity; a different approach is needed.
- Hypothermia is a serious risk even in summer due to constant dampness and cool temperatures.
Recommendation: Shift your focus from a futile battle for 100% waterproofing to a smarter system of moisture management, fast-drying layers, and a sacred, protected set of dry clothes for camp.
You’ve seen the photos: emerald forests, dramatic sea stacks, and rugged, wild beaches. But in the back of your mind, there’s a nagging worry that accompanies any plan to hike in Pacific Rim National Park Reserve—the rain. It’s not just a possibility; it’s a defining feature of the West Coast. Many hikers arrive armed with expensive gear and the belief they can seal themselves off from the elements. They invest in the best waterproof jackets and pack covers, assuming technology will keep them comfortable.
But here’s the hard-earned truth from someone who guides these trails year after year: in a temperate rainforest where humidity hovers near 100%, traditional waterproofing logic fails. Your gear will get wet. The real challenge isn’t fending off every drop of rain. The true art of West Coast hiking is mastering moisture management to stay warm, even when you’re damp. It’s a fundamental shift in thinking from a ‘waterproof’ illusion to a ‘quick-dry’ reality.
This guide will walk you through that realistic strategy. We’ll explore why this environment is so uniquely challenging, how to rethink your gear choices from your pack to your boots, and how to recognize and mitigate the real dangers, like hypothermia and storm surges. Forget everything you think you know about staying dry; it’s time to learn how to thrive in the wet.
This article breaks down a seasoned guide’s approach to preparing for the West Coast’s legendary rain. Discover the science behind the weather, the gear that actually works, and the safety protocols you can’t afford to ignore.
Summary: A Tofino Guide’s Realistic Prep Strategy for Pacific Rim Rain
- Why Does It Rain 3,000mm a Year on Vancouver Island’s West Coast?
- How to Waterproof Your Backpack for Multi-Day Coastal Treks?
- Gore-Tex vs. PU Rain Gear: Which Is Better for temperate Rainforests?
- The Hypothermia Risk That Even Summer Hikers Ignore
- When to Cancel a Coastal Hike: 3 Signs of an Incoming Storm Surge
- How to Dress for “Freeze-Thaw” Cycles Without Overheating?
- Hiking Boots vs. Trail Runners: Which Works Better for Portages?
- How to Secure Backcountry Permits for the West Coast Trail 6 Months in Advance?
Why Does It Rain 3,000mm a Year on Vancouver Island’s West Coast?
The relentless rain in Pacific Rim National Park isn’t just bad luck; it’s a powerful and predictable weather phenomenon. The west coast of Vancouver Island sits directly in the path of moisture-rich systems moving across the Pacific Ocean, often referred to as the “Pineapple Express.” When this wet air hits the Vancouver Island Ranges, it’s forced to rise rapidly. As it climbs, the air cools, condenses, and unloads staggering amounts of precipitation. This process, known as orographic lift, is why the coastline is drenched in rain while towns just a short distance inland remain significantly drier.
The sheer volume is hard to comprehend. Some areas of the coast receive over 3,000 mm (118 inches) of rain annually. To put that in perspective, that’s more than triple the rainfall of a city like Toronto. This creates the lush, temperate rainforest ecosystem but also a hiking environment where the air itself feels saturated. This constant humidity is a critical factor that affects everything from your gear’s performance to your body’s ability to stay warm.

As the illustration above shows, these are not gentle showers. They are massive weather systems colliding with a mountain barrier. Even in the summer months, the trail is rarely dry. Parks Canada reports that the West Coast Trail area receives about 330 cm (130 inches) of rain per year, with summer temperatures that can be deceptively cool. This combination of persistent wetness and mild-but-cool air is the perfect recipe for danger if you’re not prepared for the specific conditions.
How to Waterproof Your Backpack for Multi-Day Coastal Treks?
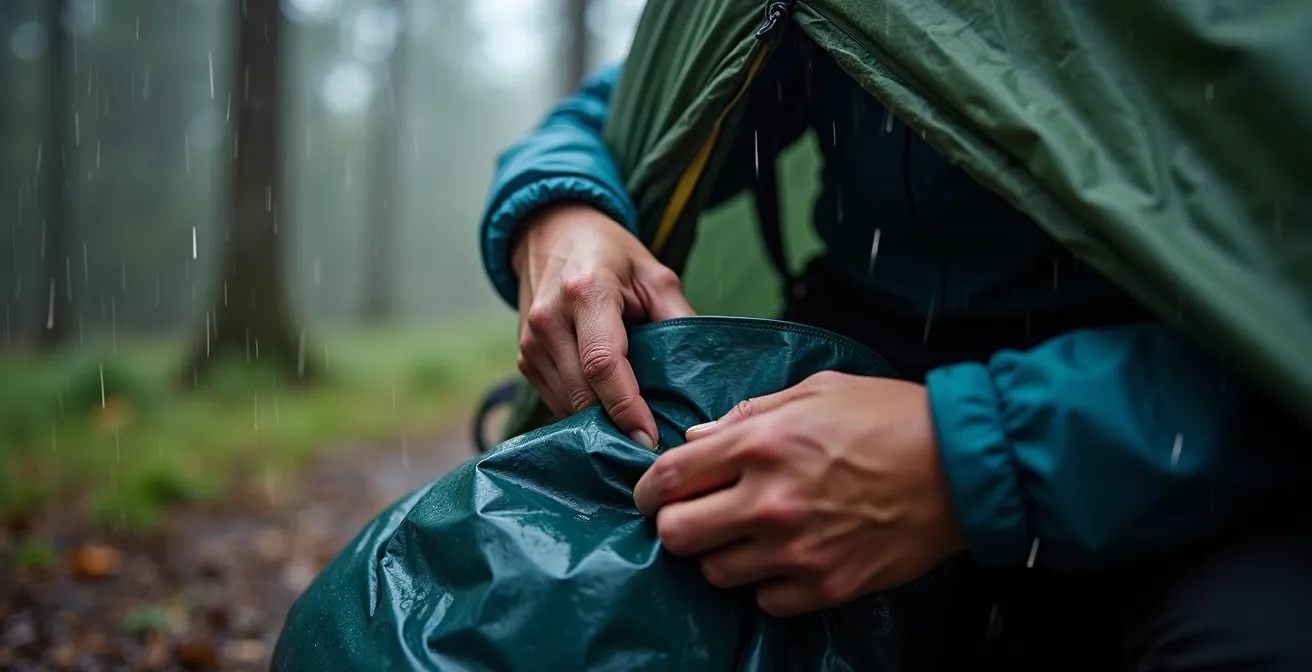
When facing constant saturation, a simple external pack cover is not enough. I’ve seen countless hikers pull out a supposedly dry sleeping bag only to find it damp and useless because they relied solely on a thin nylon cover. On the West Coast, you must think of your pack’s waterproofing as a multi-layered fortress. Your goal is to create redundant systems that can withstand not just rain, but also the inevitable slips into creeks or partial submersion during cable car crossings.
The most effective method is a two-tier internal system. First, line the *entire inside* of your backpack with a heavy-duty, industrial-grade contractor bag or a purpose-built nylofume pack liner. This creates your primary, uninterrupted waterproof barrier. Then, inside this main liner, use individual high-quality dry bags for your most critical gear: your sleeping bag, your “sacred” dry camp clothes, and your electronics. This compartmentalization ensures that even if one system fails or you open your main pack in a downpour, your life-sustaining gear remains protected.
A personal account from a seasoned hiker highlights why this is so critical. As one hiker noted, “even with perfect weather, your pack will get wet from ocean spray, creek crossings, and the constantly wet vegetation you brush against.” Your external pack cover should be seen as the first line of defense against saturation, buying you time, but never as your ultimate failsafe. You should also designate a separate, easily accessible pocket or an external dry bag for wet items like your tent fly or tarp, so you never have to put soaked gear inside your main compartment with your dry essentials.
Gore-Tex vs. PU Rain Gear: Which Is Better for temperate Rainforests?
Here’s one of the biggest and most expensive mistakes hikers make: assuming a high-end Gore-Tex jacket is the ultimate solution for West Coast rain. While breathable membranes are marvels of engineering, their performance depends on a humidity differential between the inside of your jacket and the outside air. When the external humidity is at or near 100%, as it often is in a temperate rainforest, that differential disappears. Your jacket simply can’t “breathe” moisture out, and you end up getting soaked from your own sweat.
This phenomenon is known as “wetting out,” and it’s a concept every coastal hiker must understand. As Parks Canada guidance materials explain:
When external humidity is near 100%, the breathability of even the most expensive membranes is severely compromised. The ‘wetting out’ phenomenon in high-humidity environments makes Gore-Tex perform similarly to non-breathable fabrics.
– Parks Canada West Coast Trail Guide, West Coast Trail Preparation Materials
This is where simpler, often cheaper, PU-coated (polyurethane) or PVC rain gear comes in. While it makes no claims of breathability, it also never fails in its primary mission: to be a 100% waterproof barrier. Many experienced coastal guides and fishermen rely on this type of gear for prolonged downpours because it’s durable and completely reliable. The trade-off is managing your own heat and sweat by layering appropriately underneath.
This table breaks down the realistic performance differences in a high-humidity coastal environment. It’s not about which is “better” overall, but which is better for the specific, saturating conditions of the West Coast.
| Feature | Gore-Tex/Breathable Membranes | PU-Coated Rain Gear |
|---|---|---|
| Performance in 100% humidity | Severely compromised breathability | No breathability claims to fail |
| Durability on abrasive terrain | Delicate membranes prone to damage | Robust, simple construction |
| Cost | $300-600+ | $50-150 |
| Weight | Lighter (200-400g) | Heavier (400-600g) |
| Best Use Case | High exertion in light rain | Prolonged downpours, rest stops |
The Hypothermia Risk That Even Summer Hikers Ignore
The single greatest danger on the West Coast Trail isn’t a bear or a fall; it’s hypothermia. What makes it so insidious is that it can strike even on a seemingly mild summer day. The danger lies not in freezing temperatures, but in the combination of constant dampness and persistent coolness. Parks Canada reports that the average summer temperature is just 14°C (57°F). When your body is wet from rain and sweat, this cool air wicks away body heat at an alarming rate.
This is why the concept of a “sacred dry layer” is paramount. This is one complete, non-cotton (merino wool or synthetic) set of base layers and socks that lives in its own dedicated dry bag. It is never, under any circumstances, worn for hiking. It is exclusively for putting on inside your tent at the end of the day. Changing out of your damp hiking clothes and into this perfectly dry layer is the single most important action you can take to allow your body to recover its core temperature overnight.
Preventing hypothermia during the day requires active management. Don’t take long, leisurely lunch breaks in the rain where your body can cool down. Instead, opt for short, frequent fuel stops under a tarp. Be vigilant for the early signs of hypothermia in yourself and your group, often called the “umbles”: stumbling, mumbling, fumbling, and grumbling. These indicate a drop in core temperature is affecting coordination and judgment. If you see these signs, stop, get under shelter, and begin rewarming protocols immediately.
When to Cancel a Coastal Hike: 3 Signs of an Incoming Storm Surge
The Pacific Ocean is the dominant force on this coastline, and its power must be respected. While tides are predictable, storm surges are not. A storm surge is a rise in sea level caused by a storm’s powerful winds pushing water towards the shore, and it can turn a safe beach walk into a deadly trap. Many sections of coastal trails are only passable at low tide, and a surge can erase that window of safety in minutes, pinning hikers against impassable headlands. Knowing the warning signs is not just a good idea; it’s a critical survival skill.
Before you even begin your hike, check the Environment Canada marine weather forecast for any “gale,” “storm,” or “hurricane-force” wind warnings. If these are issued, reconsider your plans. Once on the trail, you are your own weather forecaster. Watch the ocean for these three critical signs:
- Unusually large ‘rogue’ waves that appear with increasing frequency and wash much higher up the beach than the regular sets.
- A tide line that is advancing faster than what your tide chart predicts, or water that fails to recede as expected during a falling tide.
- Large driftwood logs shifting or floating at high positions on the beach, indicating the water has reached an unusually high level.
If you observe any of these signs, your immediate priority is to get to higher ground. Do not attempt to “outrun” a surge to the next campsite. Heed all advice from Parks Canada staff or First Nations Guardian Patrols. As the official park safety guidelines state, if a patrol advises you to move to a higher-elevation campsite due to an incoming storm, it is a non-negotiable safety directive, not a suggestion. Your safety depends on respecting their expert knowledge of the local conditions.
How to Dress for “Freeze-Thaw” Cycles Without Overheating?
One of the most challenging aspects of staying comfortable on the coast is managing the rapid temperature swings between different environments. You might be battling cold, driving wind on an exposed rocky headland one minute, and five minutes later find yourself in a humid, windless, and surprisingly warm section of dense forest. I call this the “freeze-thaw” cycle, and if you don’t manage it proactively, you’ll be soaked in sweat before you even realize you’re overheating.
Case Study: The Headland-Forest Temperature Effect
Experienced West Coast Trail hikers consistently report these rapid transitions. One hiker documented their experience: ‘Within 5 minutes, you go from cold, wind-battered conditions on an exposed point to a humid, warm microclimate in the forest. Without proactive layer management, you’ll be soaked in sweat before realizing you’re overheating.’ The key to managing this is not reacting to the heat, but anticipating it. The solution involves removing insulating layers and opening vents *before* entering the sheltered forest sections, rather than waiting until you start to sweat.
This requires a shift from reactive to proactive layering. Before your trip, study your map and identify these transition zones where the trail moves from exposed coastline into sheltered forest. As you approach a forest section, stop 50 meters before you enter it. This is your moment to de-layer. Remove your insulating mid-layer and open all your ventilation zips—pit-zips, main zippers, and any wrist vents. It might feel slightly cool for a moment, but it prevents the rapid build-up of sweat that will chill you later.
Your choice of clothing is also crucial. Modern “active insulation” pieces, which are designed to breathe far better than traditional fleece, are invaluable here. Paired with a high-quality merino wool or synthetic base layer that retains some warmth even when damp, this system allows you to fine-tune your temperature and avoid the miserable cycle of sweating and then chilling.
Hiking Boots vs. Trail Runners: Which Works Better for Portages?
The debate over footwear is one of the most contentious topics for the West Coast Trail, but it gets to the very heart of the “quick-dry” philosophy. The traditional thinking recommends sturdy, waterproof hiking boots for ankle support and dry feet. However, in an environment where your feet are guaranteed to be submerged in mud, creeks, or bogs, that “waterproof” boot quickly becomes a heavy, water-logged bucket that can take days to dry in the humid air. This leads to blisters, trench foot, and misery.
The modern, more effective approach is to accept that your feet will get wet and prioritize footwear that drains and dries quickly. This is where a system of non-waterproof trail runners paired with high-cuff waterproof socks (like those from Sealskinz) excels. The trail runners are light, drain almost instantly after being submerged, and can dry overnight. The waterproof socks then become your barrier, keeping your feet warm and relatively dry inside the wet shoe. As one respected backpacking guide puts it:
Since getting wet feet is inevitable on the West Coast Trail, the priority should shift to footwear that drains and dries quickly. High-cuff waterproof socks like Sealskinz then manage warmth and blister prevention.
– Happiest Outdoors Backpacking Guide, West Coast Trail Gear Recommendations
While hiking boots may offer more ankle support initially, that support is compromised when the boot is saturated and heavy. The risk of slipping on algae-covered boardwalks or roots is high with any footwear, so a good outsole with aggressive lugs like Vibram Megagrip is essential regardless of your choice. But the ability to start each day with a dry-ish shoe is a massive psychological and physical advantage.
The following table directly compares how these two systems perform under the unique stresses of the West Coast Trail.
| Factor | Traditional Hiking Boots | Trail Runners + Waterproof Socks |
|---|---|---|
| Deep Mud Performance | Become waterlogged, extremely heavy | Drain quickly, maintain manageable weight |
| Drying Time | 2-3 days in humid conditions | Overnight or less |
| Algae-covered Boardwalks | Similar slip risk | Similar slip risk |
| Ankle Support | Higher but compromised when waterlogged | Lower but consistent throughout hike |
| Blister/Trench Foot Risk | High when boots stay wet for days | Lower with quick-dry system |
| Recommended Outsole | Vibram Megagrip | Vibram Megagrip |
Key Takeaways
- The West Coast environment makes standard ‘waterproof’ gear fail; a ‘quick-dry’ and moisture management system is superior.
- Hypothermia is a year-round risk caused by dampness and cool 14°C average temperatures, not just cold.
- Accepting that you will get wet and focusing on a sacred dry layer for camp is the key to safety and comfort.
How to Secure Backcountry Permits for the West Coast Trail 6 Months in Advance?
After all this mental and physical preparation, you face one final, formidable challenge: securing a permit. The West Coast Trail is one of the most sought-after backcountry trips in North America, and spots for the entire season can sell out within minutes of the reservation system opening in January. Success requires a strategic plan and a bit of luck. The cost alone, which according to the 2025 Parks Canada fee structure is $248.50 CAD per person, underscores how serious the undertaking is.
Being unprepared on reservation day is a recipe for disappointment. You need to treat it like a mission. Having your group coordinated, your accounts set up, and backup dates ready is absolutely essential. Follow this plan to maximize your chances of success.
Your West Coast Trail Reservation Day Battle Plan
- Create your Parks Canada account well in advance of reservation day to avoid technical delays.
- Know your exact entry/exit points (Gordon River, Pachena Bay, or Nitinaht) and have several backup start dates ready.
- Coordinate with your group to have multiple people online and trying simultaneously right at 8:00 AM PST.
- Consider the less popular Pachena Bay (north) starting point, which historically has slightly better availability than Gordon River.
- If the website crashes or shows no availability, immediately call the reservation line (1-877-737-3783) as phone agents sometimes see different availability.
Case Study: World-Class Alternatives When Permits Are Gone
If you don’t secure a West Coast Trail permit, don’t despair. Vancouver Island offers several other world-class coastal treks that provide a similar experience with less competition. The 47km Juan de Fuca Marine Trail is often called “the WCT’s little brother” and has easier logistics. For an even more remote and wild experience, the 58km North Coast Trail in Cape Scott Provincial Park is a spectacular option. Finally, the Nootka Trail offers a rugged, less-regulated alternative with stunning coastal rainforest terrain. Failing to get a WCT permit can be the perfect opportunity to discover one of these incredible, less-crowded trails.
With the right mindset and a strategy built on moisture management rather than a flawed waterproofing fantasy, hiking in Pacific Rim National Park can be the adventure of a lifetime. Begin your planning now by creating your Parks Canada account and assembling your quick-dry gear system.